Tuesday, July 25, 2017

Chocolate Cake

Chocolate Cake


Chocolate Cake

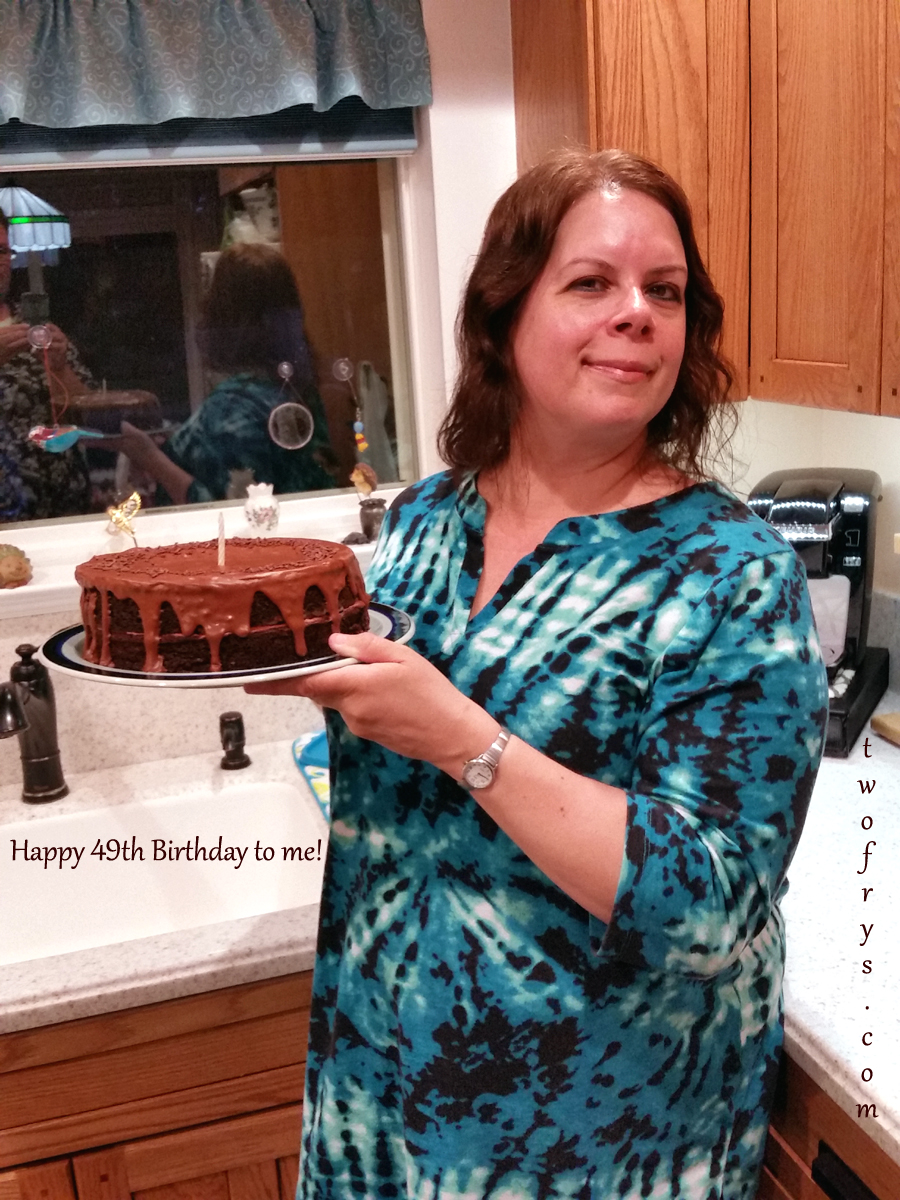
Today, I turned 49 and got up early to bake my birthday cake. This is the final recipe I made from our California vacation and the most decadent one of the four. My family took me to Black Angus Steakhouse in Dublin, CA to celebrate and it was scrumptious. I cannot believe how old I am but things could be worse. I am trying to make the best of it but after turning 30 eons ago, I do not look forward to celebrating subsequent birthdays since getting older can be traumatizing, and it has been for me in certain ways I would rather not get into. Enough of my bickering and let's get to the cake! This chocolate cake has a tender and "moist" crumb texture. Yes, I used the dreaded "m" word but it is the best word to describe this cake. The rich chocolate taste is welcoming and as I previously mentioned, decadent. Happy 49th Birthday to me! See recipe and directions below.

Chocolate Cake

Cake Ingredients
2 cups Granulated Sugar

1 3/4 cups King Arthur All-Purpose Flour

3/4 cup Hershey's Unsweetened Cocoa Powder

1 1/2 teaspoons Baking Powder

1 1/2 teaspoons Baking Soda

1 teaspoon Coarse Salt

2 Large Eggs

2 teaspoons Pure Vanilla Extract

1 cup Milk

1/2 cup Vegetable Oil

1 cup Boiling Water

Chocolate Cake

Directions
Heat oven to 350 degrees.

In a large bowl whisk together flour, sugar, cocoa powder, baking powder, baking soda, and salt; set aside.

In a small sauce pan on medium heat boil water.

Grease and flour bottom and sides of 2 9-inch baking pans. Line bottom of each pan with parchment paper and grease and flour over it shaking off excess flour.

Transfer flour mixture to mixing bowl fitted with paddle attachment on medium speed and add eggs, milk, oil, and vanilla extract and mix for about 2 minutes, until incorporated.

With mixer on low speed, carefully and slowly add boiling water and mix until incorporated.

Batter will be thin.

Chocolate Cake

Pour batter evenly into prepared pans.

Bake 30-35 minutes or until toothpick inserted in the center of the cake comes out clean. My cake baked in 32 minutes.

Check it after 28 minutes and since ovens vary, you may have to adjust baking time.

Place cake on wire racks and cool for 20 minutes and then run a butter knife around the edge of the pans.

Take wire rack and place on top of the cake and carefully invert so that the top of the cake is face down on the wire rack.

Cool completely; about 1 hour.

Chocolate Frosting
1/2 cup (1 stick) Unsalted Butter, melted

2/3 cup Hershey's Unsweeted Cocoa Powder

3 cups Confectioners'/Powdered Sugar

1/3 cup Milk (+ 1-2 teaspoons if needed + 2 tablespoons if you want the frosting to drip over the cake)

1 teaspoon Pure Vanilla Extract

My slice with Dreyer's Vanilla Bean Ice Cream

Directions
In a small sauce pan, melt butter.

Stir in cocoa and transfer to bowl of mixer fitted with paddle attachment.

With mixer on low speed, alternately add powdered sugar and milk and mix until incorporated and you reach frosting consistency.

Mix in vanilla extract.

If needed, add 1-2 teaspoons and mix for about 10 seconds more.

Makes 2 cups Frosting.

Take cake and with the top down place on serving platter or cake turntable.

Insert pieces of parchment paper under and all around the cake for easy clean up.

Take spatula and spread generous amount over the top of the cake all the way to the edges.

Place second layer of cake with top face down and firmly but gently press down making sure the top layer is even above the first layer.

Happy 49th Birthday to me ;)
Take frosting (only do this if you want frosting to drip over the cake edges but if not, continue frosting cake), and place in mixer again and add 2 tablespoons of milk and mix for 1 minute.

The frosting will have a thinner consistency but not as thin as a typical drip cake, but enough to go down on the sides.

With spatula, frost from the center of the top layer out leaving about 1 inch unfrosted around the edges of the cake.

Take frosting and frost the edges and with the spatula add more frosting and place on the very edge so it drips down. Continue to do this all around the cake until you have nice drips.

Add chocolate jimmies on top of the cake if desired.

Cover and chill in the fridge for 2-3 hours.

Take out and bring to room temperature (about 20 minutes) and serve with vanilla bean ice cream if desired.

For the "Perfectly Chocolate" Chocolate Cake, visit Hershey's:
https://www.hersheys.com/en_us/recipes/hersheys-perfectly-chocolate-chocolate-cake.html

Enjoy!

-Sophia/Two Frys

Monday, July 24, 2017

Hedgehog Cookies

Hedgehog Cookies


Hedgehog Cookies

Pretty Hedgehog Cookies

My mother-in-law Laurlee loves hedgehogs so I baked Hedgehog Cookies while on vacation in California for her. These hedgehogs cookies were easy and fun to make. I did not bring my bottles or hardly any of my cookie supplies with me so I went to Michael's and purchased Sweet Sugarbelle's Icing Bottles. I brought from home two hedgehog cookie cutters and my cookie stick. I used Sweet Sugarbelle's Rainbow Funfetti Cut-out Cookie recipe (see cookie and icing links below), and omitted the sprinkles. This is the first time I made Chocolate Royal Icing, and it worked beautifully and tastes so good! I used Unsweetened Cocoa Powder but it you want a deep drown color use Dark Cocoa Powder. Recipe and instructions below.

Yield: 1 1/2 dozen large cookies or 3 dozen small cookies (depends on cutter size)

Vanilla Sugar Cookie Ingredients
1 cup, 2 sticks Unsalted Butter, softened and each stick cut into cubes

1 1/2 cups Granulated Sugar

1 Large Egg

2 teaspoons Pure Vanilla Extract

2 3/4 cups King Arthur All Purpose Flour

2 teaspoons Baking Powder

1 teaspoon Coarse Salt

Hedgehog Cookies

Hedgehog Cookies

Directions
In a large bowl whisk together the flour, salt, and baking powder; set aside.

Cream butter and sugar in a hand held mixer or stand mixer with paddle attachment on medium speed; 1-2 minutes. Do not overmix.

Scrape sides of bowl with spatula and mix for a 5 seconds.

Add eggs, and vanilla extract and mix until incorporated. Do not overmix.

Scrape sides of bowl and mix for 5 seconds.

With mixer on low speed, slowly add flour mixture and incorporate.

The dough is ready when it begins to clump around paddle attachment.

Roll dough into a ball, cover with plastic wrap, and chill in fridge for 1-2 hours or overnight.

If you are pressed for time place in the freezer for 30-45 minutes.

Take half of the dough leaving unused dough covered with plastic wrap in fridge until ready to use.

Heat oven to 400°F.

Use two sheets of parchment paper with dough in between and roll with rolling pin until desired thickness is reached.

Cut hedgehog shapes and place onto cookie sheets lined with parchment paper.

Place cookie sheets in freezer for 15 minutes. The cookies hold their shape when you do this.

Bake 7-9 minutes or until the edges have slightly browned. My cookies baked in 9 minutes.

Wait 5 minutes before transferring cookies on cooling racks to complete cooling.

Decorate once cookies cool completely.

Cut hedgie with turquoise flower

Hedgehog Cookies - pretty and yummy!

Hedgehog Cookies

Chocolate Royal Icing Ingredients
8 cups Confectioners'/Powdered Sugar

1/2 cup Unsweetened Cocoa Powder

1/2 cup Wilton Meringue Powder

1 tablespoon Pure Vanilla Extract

3/4 cup + 2-4 tablespoons Warm Water

Chocolate Jimmies and Wilton Icing Decorations

Chocolate Jimmies and Flowers for the hedgehog cookies

Directions
In the bowl of mixer with paddle attachment and on low speed, mix together powdered sugar, cocoa powder and meringue powder.

On low speed, mix in half of the water slowly adding the rest of the water until thick like molasses.

Turn mixer to high speed, and mix for 2 minutes until the icing is light and fluffy like a meringue. Do not overmix.

If it is too thick add 1 tablespoon of warm mixer and turn mixer to high for 5 seconds more.

I used one consistency good for both the border and to flood the cookies.

Transfer to icing bottles. Keep tips covered with paper towel when not in use or it will harden.


Sweet Sugarbelle Icing Bottles

Sweet Sugarbelle Icing Bottles

Decorating Ingredients
Chocolate Jimmies

Wilton Flower Icing Decorations

Cookie Stick or Toothpick

Decorating Directions
Do a border around each cookie leaving room for the feet and face, and then flood cookie one by one.

Use a cookie stick or toothpick to pop any air bubbles.

Take the cookie and add chocolate jimmies while the icing is wet all over the cookie.

Gently shake off excess.

Then dab a drop of icing over the head of the hedgehog and gently but firmly press a flower on top.

The 2 hedgehog cookie cutters I used

Hedgies on cookie sheet chilled and ready to bake

With the icing make a nose and eye, place on wire rack to set, and move onto the next cookie and repeat the steps above until you are done.

Let the cookies set on wire racks for 4-5 hours or overnight.

Place in cookie jar or tin for up to 1 week.

For the Rainbow Funfetti Cut-out Cookies visit, Sweet Sugarbelle:
http://www.sweetsugarbelle.com/2015/07/rainbow-funfetti-cutout-cookie-recipe/

For the Chocolate Royal Icing visit, Sweet Sugarbelle:
http://www.sweetsugarbelle.com/2012/02/chocolate-royal-icing/

Enjoy!

-Sophia/Two Frys

Saturday, July 22, 2017

S'mores Chocolate Chip Cookies

S'mores Chocolate Chip Cookies


S'mores Chocolate Chip Cookies

I recently pinned a Toasted S'mores Chocolate Chip Cookies recipe from Sally's Baking Addiction (link below), and eagerly waited until vacation in California to bake them for my family. This recipe is simple and does not require a mixer so that is an added bonus. The cookies were a hit with my family. The toasted marshmallows, graham cracker pieces and extra chocolate chips served on top just after coming out of the broiler, they were ooey-gooey yumminess. 

Yield: About 1 1/2 Dozen Cookies


S'mores Chocolate Chip Cookies best served warm!

Ingredients
2 1/4 cups All-Purpose Flour

1 1/2 teaspoons Corn Starch

1 teaspoon Baking Soda

1/2 teaspoon Coarse Salt

3/4 cup Light Brown Sugar, loosely packed

1/2 cup Granulated Sugar

3/4 cup (1 1/2 sticks) Unsalted Butter, melted

1 Large Egg + 1 Egg Yolk, room temperature

2 teaspoons Pure Vanilla Extract

1 cup Semi-Sweet Ghirardelli Chocolate Chips

S'mores Chocolate Chip Cookies

Topping
3/8 cup (6 tablespoons) Semi-Sweet Chocolate Chips

2 full sheet Graham Crackers, cut into small bits and pieces

1/2 cup Mini Marshmallows

Directions
Whisk together the flour, corn starch, baking soda, and salt; set aside.

Melt butter in small sauce pan. Cool for 10 minutes.

In a medium size bowl, whisk together the melted butter, granulated and light brown sugars until incorporated.

About to incorporate ingredients

Combining ingredients

Whisk in the egg, egg yolk, and vanilla extract and incorporate.

Add egg mixture into flour mixture and incorporate with spatula.

The dough is soft but thick.

With a spatula fold in the chocolate chips.

Form dough into ball and cover with plastic wrap, and place in fridge for 2-3 hours or overnight.

Take dough out and let come to room temperature.

Heat oven to 350 degrees.

Line baking sheets with parchment paper.

Using a large ice cream scoop place balls on lined cookie sheets and bake for 10 minutes.

While cookies are baking get topping ingredients measured and ready.

Dough ready to chill

Take cookies out of the oven, and place mini marshmallows, chocolate chips, and graham cracker bits on top of each cookie.

Put cookies back in the oven for another 2 minutes.

Remove cookies and set oven to broiler.

Put under the broiler for 30 seconds to toast the marshmallows, graham cracker bits, and to melt the chocolate chips.

Place cookies on cooling racks and serve warm after a few minutes.

For the Toasted S'mores Chocolate Chip Cookies recipe, visit Sally's Baking Addiction:
https://sallysbakingaddiction.com/2015/10/12/toasted-smore-chocolate-chip-cookies/

Enjoy!

-Sophia/Two Frys

Friday, July 21, 2017

Blueberry Muffins

Blueberry Muffins

Blueberry Muffins

Blueberry Muffins
Allen and I went to Northern California to be with his parents for two weeks and while there, I baked blueberry muffins, s'more chocolate chip cookies, hedgehog sugar cookies with chocolate royal icing, and chocolate cake for my birthday. I also made my father-in-law his favorite Lemon Meringue Pie and made Veggie Pasta Salad when Aunt Jeanne and doggie Buddy visited. This muffin recipe is from Ina Garten (see link below). The muffins have a fluffy cake-like texture, are moist and have blueberries in every bite. These blueberry muffins are best served warm with coffee, tea or a cold glass of milk. See recipe below.

Yield: About 18 muffins depending on size (I made 6 large and 12 standard muffins)


Blueberry Muffins

Blueberry Muffins, close-up

Ingredients
2 1/2 cups King Arthur All-Purpose Flour

2 teaspoons Baking Powder

1/2 teaspoon Baking Soda

1/2 teaspoon Coarse Salt

1 1/2 cups Granulated Sugar

12 tablespoons, 1 1/2 sticks Unsalted Butter, cut into cubes; room temperature

1 cup Sour Cream

1/4 cup Milk

3 Large Eggs, room temperature

1 1/2 teaspoons Pure Vanilla Extract

1 pint Fresh bluberries, washed, and picked for stems

Blueberry Muffins just taken out of the oven

Blueberry Muffins on cooling rack

Directions
Heat oven to 350 degrees.

Place paper liners in muffin tins; set aside.

In a large bowl whisk together the flour, baking powder, baking soda, and salt; set aside.

Add butter and sugar to bowl of mixer fitted with paddle attachment and cream on medium speed for about 3 to 4 minutes until light and fluffy.

Blueberry Muffins in oven

Turn mixer to low speed and add the eggs one at a time and mix until incorporated.

Add the vanilla extract and sour cream and mix until incorporated.

On low speed slowly add the flour mixture until incorporated.

Turn mixer off and using a spatula fold in the blueberries.

Batter is ready!

Using an ice cream scoop add batter to lined muffin tins leaving about 1/2 inch on top.

Bake for 25 to 30 minutes, until muffins have browned slightly and toothpick inserted in center comes out clean.

For Ina Garten's Blueberry Coffee Cake Muffins, visit:
http://www.foodnetwork.com/recipes/ina-garten/blueberry-coffee-cake-muffins-recipe-1917173

Enjoy!

-Sophia/Two Frys

Sunday, July 9, 2017

Fidget Spinner Cookies

Fidget Spinner Cookies That Spin


Fidget Spinner Cookies That Spin!

My spinner and Fidget Spinner Cookies

Happy National Sugar Cookie Day! I hadn't bought a fidget spinner until yesterday since I wanted to make fidget spinner cookies that spin after seeing a bunch of videos on Pinterest. I ordered a fidget spinner cutter from American Tradition Cookie Cutters, and purchased a fidget spinner at Five Below on sale for $3. They are fun. Wee!!! Spin-spin... I saved some of the cookie dough from baking last weekend to make three cookies to celebrate this special day for all cookie decorators and cookie lovers. For the recipe, go to my Firework Cookies post and omit the sprinkles. The cookies were fun to make. I did 2 very elementary videos so you can see the cookies spin. See directions below.


Directions
With a fidget spinner cutter or a template cut desired amount of cookies.

Use a paper straw to make a hole in the center of each cookie.

Use the bottom of a decorating tip and press into dough on the three corners to make the holes.

Use a small round cutter to make 2 buttons for each cookie. You will affix these with a piece of straw so they spin later.

Spinner I bought

My spinner and fidget spinner cookie cutter

Cut about 1 1/2 inches pieces of straw for the amount of cookies you bake.

With royal icing colors of your choice, make all the borders and fill each cookie.

Once dry, do black border around the small center circle and the three circles.

Let cookies dry completely.

What you need to make these cookies

I only used 1 straw since I only made three cookies

Do 1 cookie, insert straw piece and then dab a little royal icing onto the back of one of the buttons.

Use enough royal icing to make the cookie stick to the straw piece. Repeat and add the other button on the top side of the cookie. Press together gently.

Use bottom of pastry tip to make the circles

Since my circle cutter was fluted I used the end side to make the buttons; do 2 for each cookie

Repeat this step until you are done.

Let it set on wire rack for at least 2 hours.

Royal Icing 

Cookies ready for royal icing

If desired, gently brush cookies with white or silver luster dust so they shimmer.

Spin your cookie and eat it.

Enjoy!

-Sophia/Two Frys

Saturday, July 8, 2017

Coconut Flan

Coconut Flan


Coconut Flan
I made Coconut Flan with my Mom today and the only 2 adjustments I made was adding 1/2 teaspoon Coarse Salt and setting the oven to 350 degrees not 325. My Mom made the caramel while I combined the rest of the ingredients in a large bowl using a whisk. I grew up with my Mom making Flan several times a year usually on holidays. Now that she is older and going through beginning stages of dementia, she hardly cooks or bakes anymore. She could not remember how to make caramel so I guided her along and was happy to share this moment with her. I think she enjoyed it and she loved the Coconut Flan. The coconut taste is prominent from the Cream of Coconut and Coconut Milk and has an lovely taste. The Coconut Flan texture is silky smooth and rich. Ingredients and directions follow.

Ingredients
1 cup Granulated Sugar

5 Large Eggs

1 cup Sweetened Condensed Milk

1 cup Cream of Coconut

1 can Unsweetened Coconut Milk

1 teaspoon Pure Vanilla Extract

1/2 cup Water + warm water for water bath

Caramel cooling in pan

Directions
Heat oven to 350 degrees.

In a small saucepan over medium heat, bring sugar and water to a boil.

Stir with wooden spoon until the sugar dissolves.

Continue cooking by swirling the pan for about 10 minutes or until the caramel turns light golden brown.

Pour hot caramel into pie or cake pan; set aside to cool. I used a 9-inch cake pan.

In a large bowl, whisk together the eggs until incorporated.

Whisk in condensed milk, cream of coconut, and coconut milk until incorporated and smooth.

Add vanilla extract and whisk for a few seconds to combine.

Once caramel has cooled, pour egg mixture into pan.

Place pan inside large shallow baking dish in the oven and pull the rack out, and add warm water filling up to halfway of the pan.

Cover with aluminum foil.

Bake for 1 hour and 30 minutes until flan is set with a golden top and still wiggly in the center but cooked.

Oven times vary so you may need less or more time. Start checking the flan after 1 hour and 15 minutes.

When done, remove from oven and allow flan to cool at room temperature in the water bath. This allows the flan to cool gradually.

Gently run a butter knife around the edges and invert onto a large serving plate.

Cover with plastic wrap and place in fridge to chill.

Serve chilled.

For the Coconut Flan recipe, visit Goya:
https://www.goya.com/en/recipes/coconut-flan

Enjoy!

-Sophia/Two Frys

Tuesday, July 4, 2017

Marbled Star Cookies

Marbled Star Cookies


Marbled Star Cookies

Marbled Star Cookies

I came across marbled star-spangled cookies on Sugar Spun Run (link below) and wanted to make these cookies for July 4th. They are so pretty and sort of messy to make, but fun. I have been planning on using the marbling technique and this was a great holiday to do it. This is a great recipe to do with kids. For the Funfetti Cut-out Cookie recipe, go to my Firework Cookies post. Marble Glaze Icing recipe and instructions below.

Marbled Star Cookies

Marbled Star Cookies
Triple star cookies

Yield: 3 Dozen 3-inch cookies

Marble Glaze Icing Ingredients

3 cups Powdered Sugar

3 tablespoons Light Corn Syrup

3-4 tablespoons Milk

1/2 teaspoon Pure Vanilla Extract

1/4 teaspoon Almond Extract

AmeriColor Soft Food Gel Paste Food Color in Super Red and Royal Blue

Optional: Wilton Edible Accents Silver Stars

Optional: Wilton White Luster Dust

Pretty stars

Very patriotic!

Each cookie has its unique design

Directions
In a large bowl whisk together the powdered sugar, 3 tablespoons of milk, and light corn syrup until smooth.

If the glaze is too dry, add 1 more tablespoon of milk.

Add vanilla and almond extracts and stir.

Marbled Star Cookies

Lovely designs

Divide glaze into four containers with lids.

Use one bowl at a time and dip toothpick into gel colors and then into glaze and swirl with Wilton Scribe Tool or a toothpick to make a pretty design.

Make each container a different variation of color with more red or more blue if you wish. That is what I did since I wanted various designs.

Star Spangled Cookies

Cookies setting

AmeriColor Gel Paste in Super Red and Royal Blue, Wilton Silver Stars and White Luster Dust

Make sure cookies are on wire racks in cookie sheets for icing overflow.

Dip cookie into glaze, swirl around, and place on wire rack.

If you wish, add Wilton Edible Accents Silver Stars and repeat until you are done.

Swirling the colors together

Cookies cooled and ready to add marble glaze

Making star shapes in dough

Once cookies dry, take a brush and gently add a little Wilton White Luster Dust on cookie. Do this by flicking the brush with your finger over the cookie. Repeat until you are done dusting all the cookies. This is optional but makes the cookies shimmer.

For the Star-Spangled Cookies recipe and video tutorial, visit Sugar Spun Run:
https://sugarspunrun.com/star-spangled-cookies/

Enjoy!

-Sophia/Two Frys