Showing posts with label Cupcake. Show all posts

Wednesday, October 30, 2019

Halloween Cupcakes

Halloween Cupcakes


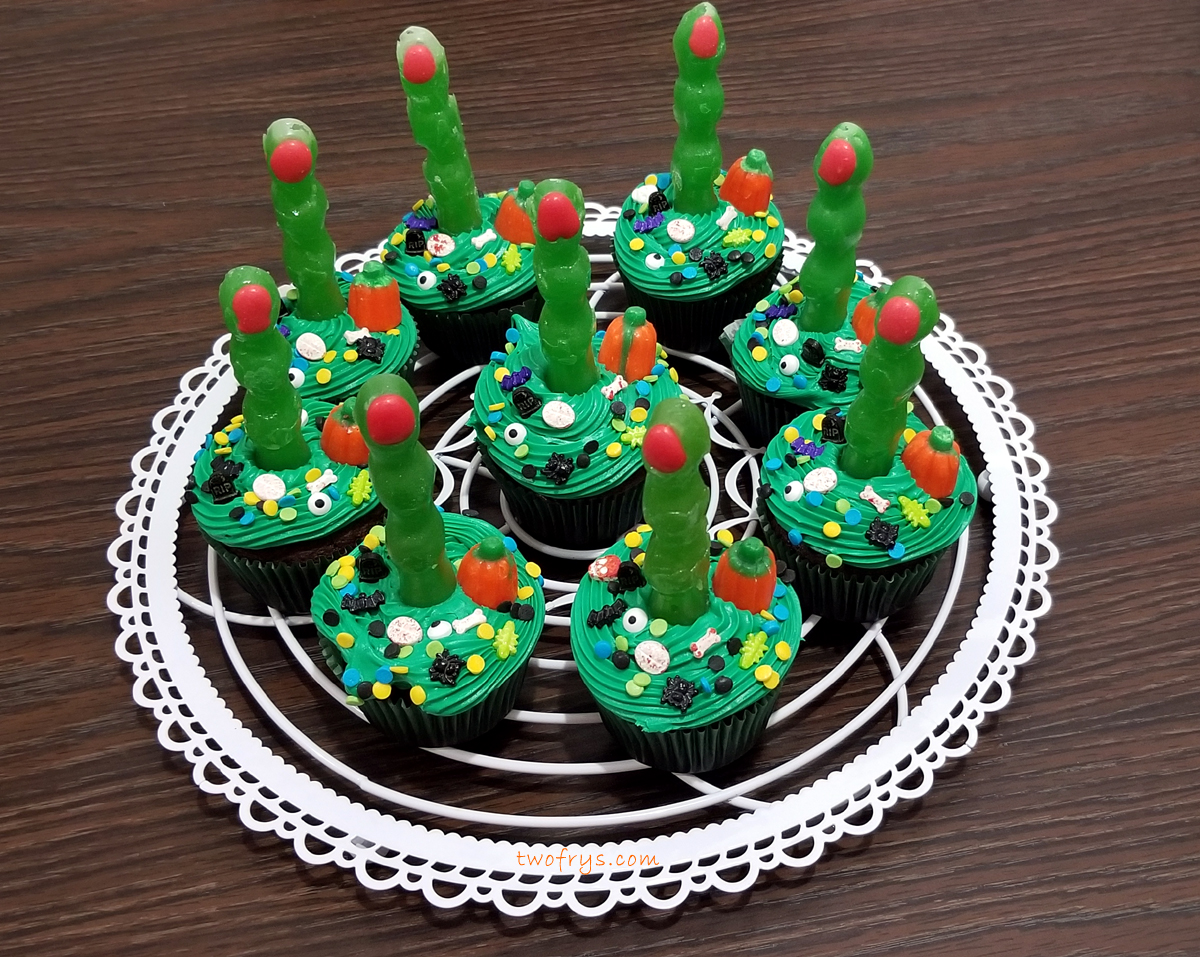
Happy Halloween everyone! I did not have enough time to make Halloween Sugar Cookies this year but made some Halloween Cupcakes: Zombie Finger and Mummy Cupcakes, and Halloween Linzer Tarts. I used Pillsbury Moist Supreme Devil's Food Premium Cake Mix, and two frostings: Pillsbury Vibrant Green Vanilla and Vanilla for the Mummy Cupcakes. I used several Halloween sprinkle decorations to make the Zombie Finger Cupcakes look a little creepy-spooky. I bought the Zombie Finger Sour Apple Lollipops at Dollar Tree when they first started putting out Halloween stuff. These cupcakes were fun and easy to put together and are a great activity to do with your family.
Zombie Finger Cupcakes

Mummy Cupcakes

Ingredients
1 box mix or your favorite Devil's Food Cake recipe

1 container of Green Frosting

1 container of Vanilla Frosting

Candy Eyes for the mummy

Various sprinkles, and candy decorations


Zombie Finger Cupcakes

Mummy Cupcakes

2 Pastry Bags

1 flat decorating tip (I use Ateco 45 to make the mummy cupcakes)

Any pastry tip you like to make a swirl (I use Wilton 6B Open Star)


Zombie Finger Cupcakes close-up

Zombie Finger Cupcakes

Zombie Finger Cupcakes

Directions
Bake cupcakes and cool on wire racks before adding frosting.

Fit tip in pastry bag and fill with the green frosting. Use a clip or rubber band so the frosting does not spill from the top of the pastry bag.


Vanilla Frosting and Candy Eyes

Mummy Cupcakes

Mummy Cupcakes

Make a swirl on each of the zombie finger cupcakes and insert a zombie finger lollipop in the center, and then decorate with desired sprinkles and candy decorations.

To make the mummy cupcakes, use a small offset spatula and dab a light coating of the vanilla frosting over each cupcake and press two eyes into each one.


Zombie Finger Cupcakes close-up

Some of the cupcakes cooled and ready to frost

Easy peasy ingredients - the shortcut route when you a short on time

Fit tip in pastry bag and fill with vanilla frosting. Use a clip or rubber band so the frosting does not spill from the top of the pastry bag.

Make lines going back and forth and up and down to give a mummy effect onto each cupcake.


Mummy Cupcakes

Mummy Cupcakes

Mummy Cupcakes
Cover and let the cupcakes set in the fridge for 2-3 hours.

Let the cupcakes stand at room temperature for 1/2 hour before serving.

Enjoy!

-Sophia/Two Frys

Saturday, May 4, 2019

Kentucky Derby Cupcakes

Kentucky Derby Cupcakes

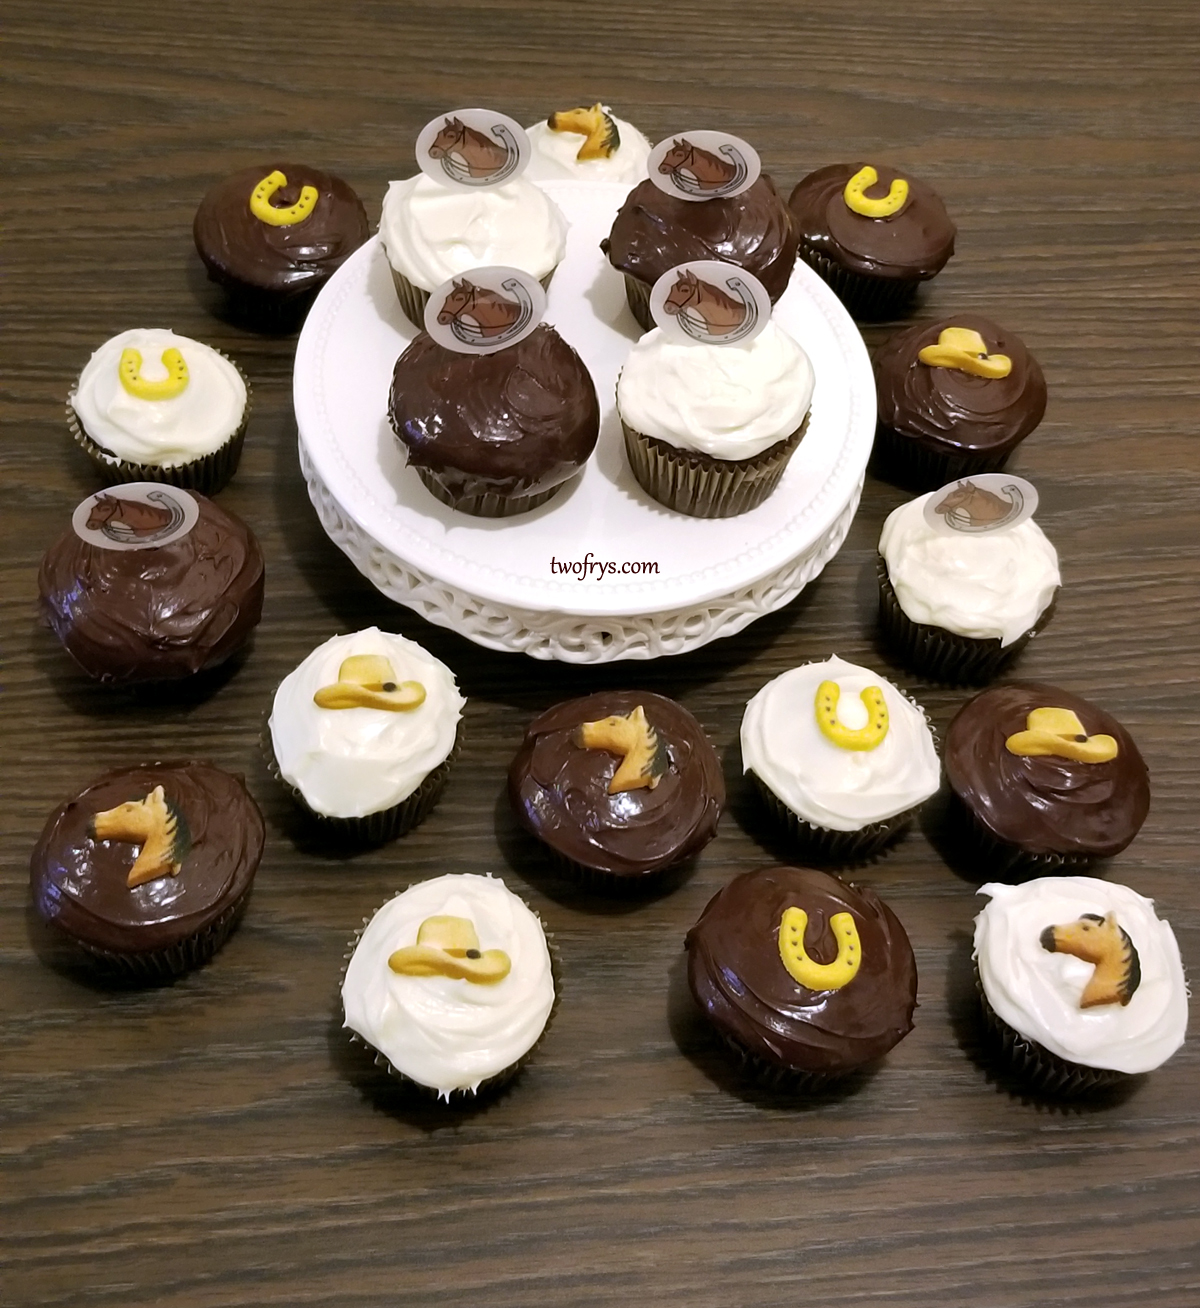
Happy Kentucky Derby Day! I made 2 dozen cupcakes to celebrate this grand event. Too bad it is gloomy in Kentucky Derby land but that won't damper the excitement of the day. Which horse is your favorite? I don't have one in mind but I do enjoy watching it. I hope the weather improves out there. 

Kentucky Derby Cupcakes

Kentucky Derby Cupcakes
For this recipe, I used Pillsbury Moist Supreme Devil's Food Premium Cake Mix, and 1 container each of Betty Crocker Rich & Creamy Dark Chocolate and Duncan Hines Whipped Cream Cheese Frosting. If you have more time you can use your favorite cake and frosting recipe. When time is short this is a great alternative that tastes great. For other Kentucky Derby recipes, check out my Kentucky Butter Cake Cookies; Kentucky Bourbon Pecan Pie and Kentucky Butter Cake.

Kentucky Derby Cupcakes 

Kentucky Derby Cupcakes

Kentucky Derby Cupcakes; love the candy decorations
I found some cute edible decorations online of a cowboy hat, horse head, horse shoe and also some cupcake picks with a horse head and horse shoe design. These were fun to put together. I let the frosted cupcakes set overnight in the fridge in a cupcake container. This morning, I added the decorations gently pressing down on the frosting.

Love the designs

Cool cowboy cake and horse edible decorations

Horse and horse shoe cupcake pick design
I had 2 cupcakes for breakfast and the devils' food cake is moist and very rich from the dark chocolate frosting. The tang from the whipped cream cheese frosting balances the sweetness of the cupcake. 

Some of the edible decoration and cupcake picks

Cupcakes cooled and ready for frosting

Enjoy!

-Sophia/Two Frys

Friday, October 27, 2017

Ouija Cupcakes

Ouija Cupcakes


Ouija Cupcakes

Ouija Cupcakes

Ouija Cupcakes

I had scary experiences using a Ouija board in my teen years and will never use one again, but I was not afraid of making these Ouija Cupcakes for Halloween. It was actually fun putting them together. I used Ina Garten's Devil's Food recipe as shared by Food52 (link below) and the Buttercream recipe is from Wilton (also used in my Pumpkin Cupcakes and Brain Cupcakes). The Ouija designs are printed on wafer paper. To assemble the Ouija toppers, I used a toothpick and then dipped a brush into light corn syrup pressing two sides of the same design while gently adhering it into the top of a toothpick. I let the toppers dry for an hour and then inserted each one into the center of a cupcake. I put the cupcakes in the fridge to set for 2-3 hours. These look super cool and are great for Halloween.

Putting the Ouija toppers together

Ouija toppers are done

Close-up of one of the Ouija designs

For Ina Garten's Devil's Food Cake visit, Food52:
https://food52.com/recipes/62184-ina-garten-s-devil-s-food-cake

For the Buttercream Frosting visit, Wilton:
http://www.wilton.com/buttercream-frosting/WLRECIP-41.html

Enjoy!

-Sophia/Two Frys

Thursday, October 26, 2017

Brain Cupcakes

Brain Cupcakes


Brain Cupcakes

Fred Nom Skull Baking Cups
Allen got me Fred Nom Skull Baking Cups for Christmas and I waited for Halloween baking time to make Brain Cupcakes. The wait was so worth it. To make the mauve pink color for the brain, I used Wilton Concentrated Gel Icing Color in Pink and Brown, adding a few drops of each color in the frosting until I reached the desired color. The frosting and cupcake recipes are the same as my previous post Pumpkin Cupcakes (links below). If you do not want to use Pumpkin for the cupcakes, Vanilla cupcakes with a few drops of either a little orange or pink color would work great. I was inspired by the blog Bren Did (link below) and her adorable brain cupcakes and the tutorial is great!

Baking cups sprayed and ready to fill

Allen's Brain Cupcake
I sprayed the inside of the baking cups with a little Wilton Bake Easy! Non-Stick Spray and filled each cup leaving 1/3 since the batter will rise when they bake in the oven. I kept the cupcakes in the baking cups and frosted the top of the cupcakes with a thin layer using an offset spatula. I filled a small squeeze bottle with a round tip to make the brain frosting. I started with two lines in the center and for the left and right side of the brain made 2 squiggles on each side. Let frosting set for 2-3 hours in the fridge and serve in the baking cup. Right before eating just gently squeeze out of the cup and the cupcake will release and you will see the skull head imprint.

For the Buttercream Frosting visit, Wilton:
http://www.wilton.com/buttercream-frosting/WLRECIP-41.html

For the Pumpkin Cupcakes visit, The Cake Blog:
http://thecakeblog.com/2011/11/pumpkin-cupcakes-recipe.html

For a great Brain Cupcake tutorial, visit Bren Did:
https://brendid.com/all-natural-zombie-brain-cupcakes/

Enjoy!

-Sophia/Two Frys

Wednesday, October 25, 2017

Pumpkin Cupcakes

Pumpkin Cupcakes

Pumpkin Cupcakes

Pumpkin Cupcakes

I love pumpkin everything. For Halloween, I wanted some Pumpkin Cupcakes with a pumpkin topper made from Wilton Candy Melts in Orange. I used half of the cupcakes for Brain Cupcakes which I will share in the following post. For the buttercream, I used Wilton Buttercream Frosting recipe and added 5 drops of AmeriColor Soft Gel Paste Food Color in Super Black. The Pumpkin Cupcakes recipe is from The Cake Blog and were not too sweet and so soft and moist. I added 1 extra teaspoon of pumpkin spice for extra pumpkin flavor.

Pumpkin Cupcakes


Pumpkin candy melts
To make the candy melts, place in a pastry bag that is knotted on top in the microwave for 30 seconds at a time until they melt. My candy melts took about 1 1/2 minutes to melt. Snip the tip and fill your molds. Tap the molds on your counter top to pop any air bubbles. Freeze for 15 minutes and carefully release. I kept the pumpkin candies in the fridge until I needed them.

Candy melts in pastry bag, pumpkin mold

Add melted candy into mold and just freeze for 15 minutes, easy peasy
For the Buttercream Frosting visit, Wilton:
http://www.wilton.com/buttercream-frosting/WLRECIP-41.html

For the Pumpkin Cupcakes visit, The Cake Blog:
http://thecakeblog.com/2011/11/pumpkin-cupcakes-recipe.html

Enjoy!

-Sophia/Two Frys

Saturday, April 15, 2017

Bunny Tails Cupcakes

Bunny Tails Cupcakes

Bunny Tails Cupcakes
The cutest Bunny Tails Cupcakes
I found a kit from Wilton (see pic below) at Target to make Bunny Tails Cupcakes and bought extra Wilton White Pearlized Jimmies to make sure I had enough. I made a dozen splitting the cupcake recipe from my previous post, Bunny Ears Cupcakes. Go to the link for the cupcake recipe and vanilla frosting. I used a vanilla cupcake recipe from Life, Love and Sugar and it was a recipe I will use it again. The cupcake was tender and moist and full of vanilla yumminess.

Close-up of Bunny Tails Cupcakes
Another close-up of Bunny Tails Cupcakes
I suggest using hot pink liners for your cupcakes.

Start by making the cupcakes and frosting.

Bunny Tails Cupcakes all done!
In a medium size bowl, add sprinkles.

Once the cupcakes have cooled completely, frost all the cupcakes making sure to cover the tops to the edges.

Wilton Bunny Tails Kit
Wilton White Pearlized Jimmies, they sparkle
After you have frosted all the cupcakes, take each one and dip into the jimmies. 

Pour sprinkles over the sides to cover completely.

Then take a bunny tail and dab a little frosting on the bottom, and press onto cupcake.

Repeat these steps until you have done them all.

Press cupcake into sprinkles
Then do the same for the bunny paws and place them as seen in the photos.

That's it! Super easy and they are adorable. This is a great recipe to do with your family. 

-Enjoy

-Sophia/Two Frys