Wednesday, March 23, 2016

Red Velvet Peanut Butter Blossoms

Red Velvet Peanut Butter Blossoms

Red Velvet Peanut Butter Blossoms
I am a huge fan of Amanda from I Am Baker, and have been dying to make these Red Velvet Peanut Butter Blossoms. My intent was to make them for Valentine's Day but I did not have enough time, since I baked Coconut Heart Cookies and Red Velvet Heart Cookies. I made time Sunday morning and baked these wondrous delights. Instead of using red food coloring, I use Lorann Professional Kitchen Red Velvet Bakery Emulsion to bring out the flavor and tint the dough. For the sugar, I used light brown and granulated. I also added distilled white vinegar just like when you make a red velvet cake. You really have to make these cookies. The flavor is red velvety goodness, and the cookies are rich and decadent. I share the recipe below.

Yield: 3 dozen cookies


Red Velvet Peanut Butter Blossoms
Ingredients
1 bag Hershey's Kisses

1/2 cup (1 stick) butter, room temperature and cut into 8 pieces

3/4 cup Creamy Peanut Butter

3/4 cup Granulated Sugar

1/3 cup Light Brown Sugar

1 XL Egg

2 tablespoons Milk

2 teaspoons Pure Vanilla Extract

2 tablespoons Lorann Professional Kitchen Red Velvet Bakery Emulsion

1/2 teaspoon Distilled White Vinegar

3 tablespoons Unsweetened Cocoa

1 1/2 cups King arthur All Purpose Flour

1 teaspoon Baking Soda

1/8 teaspoon Coarse Salt

1/4 cup Red Sanding Sugar

Red Velvet Peanut Butter Blossoms

Instructions
In a separate bowl sift cocoa, flour, baking soda, and salt, set aside.

Unwrap the Hershey's Kisses, set aside.

Pour red sanding sugar in a bowl, set aside.

Red Velvet Peanut Butter Blossoms

Heat oven to 375 degrees.

Beat butter, peanut butter, and sugars in stand mixer with paddle attachment on medium speed, about 2 minutes.

With mixer on low, add egg, milk, vanilla extract, and Lorann Professional Kitchen Red Velvet Baking Emulsion. Mix until incorporated, about 25 seconds.

Turn mixer on medium high speed, and blend until light and fluffy, about 2 minutes.

Just baked, cooling
With mixer on low speed, slowly add flour mixture and beat until incorporated.

Add vinegar just until incorporated.

Shape dough into one inch balls and roll one by one around the red sanding sugar. I reserved a dozen without rolling into the sanding sugar since I did not want the extra sugar.

Place on cookie sheet lined with parchment paper about 2 inches apart.

Bake for 8 to 10 minutes. My cookies baked in 10 minutes.

Some with red sanding sugar and some without
Once cookies are baked, press a chocolate Kiss into the center of each cookie. The cookie should crack around the edges.

Place cookies on wire rack to cool completely, about 1 hour.

For the Red Velvet Peanut Butter Blossoms recipe, please visit I Am Baker:
http://iambaker.net/red-velvet-peanut-butter-blossoms/

Enjoy!

-Sophia/Two Frys

Monday, March 14, 2016

Lime Shamrock Cookies

Lime Shamrock Cookies

Lime Shamrock Cookies
It's almost St. Patrick's Day! To celebrate this day, I baked Lime Shamrock Cookies yesterday. The lime juice and lime zest really brings out the fresh flavor of these cookies. The recipe is adapted from Sweetopia, but I reduced the sugar by 1/2 cup and added more lime zest. I share the recipe below.

Close-up, Lime Shamrock Cookies
Yield: 3 dozen cookies.

Ingredients
2 cups (4 sticks) Unsalted Butter, softened and each stick cut into 8 cubes

2 Extra Large Eggs

1 1/2 cups Granulated Sugar

5 cups All Purpose Flour (I use King Arthur)

Zest of 3 Limes

3 tablespoons Freshly Squeezed Lime Juice

1 teaspoon Coarse Salt

Lime Shamrock Cookies

Directions
Cut each stick of butter into 8 pieces.

Sift flour and salt in large bowl and combine with whisk or spatula; put aside.

Cream the butter and sugar together in a bowl of an electric mixer with paddle attachment on low to medium speed. Mix until incorporated, about 1 minute.

Shamrocks with sprinkles
Scrape sides of bowl with spatula and mix again for 5-10 seconds more.

Add eggs one at a time. Scrape down bowl with spatula and mix again for another 5 seconds.

Add lime zest and lime juice and mix for 30-45 seconds.

Shamrock Cookies with silver dragees

Slowly add flour mixture and mix on low speed for 1-2 minutes.

When dough clumps around paddle attachment it is ready.

Form dough into a ball, cover with plastic wrap, and cool in fridge for 1-2 hours or overnight.

Lime Shamrock Cookies

Heat oven to 350 degrees.

Take 1/4 of the dough, use rolling pin and roll out between 2 pieces of parchment paper to desired thickness, dip cutter in a little flour, and cut out shapes. I use Wilton Shamrock cutter. Repeat rolling the dough and cutting shapes until you use it all.

Place shamrock shapes on parchment lined baking sheet and space apart 2 inches. Put cookies in the freezer for 10-15 minutes before baking. They hold their shape when you do this.

Bake cookies for 9-13 minutes, or until edges are slightly browned. My cookies baked in 13 minutes.

Lime Shamrock Cookies

Let cookies cool in baking sheet for 5 minutes and then transfer to wire rack to cool completely, about 1 hour.

Let cookie sheets cool completely before you bake again. I put the cookie sheet in the freezer for 5 minutes. Repeat until you have baked all the cookies.

Large Batch Royal Icing
Ingredients
8 Egg Whites

8 teaspoons Lemon Juice, freshly squeezed

12 cups Powdered/Confectioners' Sugar, sifted

Lime Shamrock Cookies

Directions
In a large bowl, sift powdered sugar, set aside.

In a medium size bowl, whisk together the egg whites and lemon juice.

Transfer the egg whites and lemon juice mixture to stand or hand held mixer with paddle attachment and mix on high for 1-2 minutes.

With mixer speed on low, slowly add sifted sugar and beat on low until smooth.

Lime Cookie Dough

If needed, you may add 1 teaspoon of water at a time until you reach the right consistency. Watch the Joy of Baking (link at the end) video for both Flooding Consistency and Piping Consistency Royal Icing. If you prefer a recipe using Meringue Powder, it is also available at this link.

I separate the icing in plastic containers with lids according to the amount of colors I need for tinting.

I use Americolor Soft Gel Paste Food Color in Green. I made three shades of green for color variation.

Royal Icing hardens fast so keep it covered when not in use.

I transferred the icing immediately into Squeeze Bottles using a funnel to prevent it from spilling. If the Royal Icing hardens due to exposure to air, spray a little bit of water and shake bottle well holding the tip with your finger. Test the icing consistency on a paper towel before decorating the cookie.

Use a paintbrush or cookie stick to reach edges and use tip of cookie stick or a toothpick to pop any air bubbles.

I lined a cookie sheet with paper towels and placed the cookies on cooling tray over it.

Sugars, Pearls, Sprinkles and Dragees I use to decorate the cookies

I used the following for decoration:
Wilton Green Sparkling Sugar
Wilton Green Sanding Sugar
Wilton White Sugar Pearls
Wilton Green Sprinkles
Silver Dragees

For further information:
For the citrus sugar cookie recipe, please visit Sweetopia:
http://sweetopia.net/2012/07/when-life-gives-you-lemons-lemon-cookie-recipe-tutorial/

For the Royal Icing recipe and video tutorial, please visit:
http://www.joyofbaking.com/RoyalIcing.html

For more information on St. Patrick and the history of St. Patrick's Day, please visit:
http://www.history.com/topics/st-patricks-day

Enjoy!

-Sophia/Two Frys

Saturday, March 12, 2016

Zoodles (Zucchini Noodles)

Zoodles (Zucchini Noodles)

Zoodles (Zucchini Noodles)
This handy little Supreme Home Cook Spiral Slicer unit makes both larger (like I made) and smaller spiral vegetables. When food shopping, I chose 4 zucchini similar in size to the slicer receptacle. The unit is two sided, one for larger spirals and the other side for smaller spirals. Some of the zucchini comes out fairly long if you keep good pressure pushing down as you spin. The spiral slicer should be used with care so you do not get your finger inside it while spinning the vegetables.

Supreme Home Cook Spiral Slicer
I used round zucchini that were 1 1/2 inch thick and it worked well. I could have used larger zucchini, but real big ones would not work well with this particular spiral slicer. I spiral sliced the zucchini after trimming the tip and stem ends. I left the skin on the squash for the vitamins.

Close-up of zoodles
In a small steamer, boil water and add the zoodles. Lightly sprinkle with kosher salt and steam for 4-6 minutes. If you steam them longer the texture will be too soft. This amount of time keeps the zoodles "al dente". Drain and blot zoodles with paper towel to remove excess water.

Using the spiral slicer to make the zoodles
Making zoodles
Place on plate and top with your favorite sauce, and/or meat. My wife made her quick pasta sauce and turkey meatballs. To finish the sauce she added, parsley, shredded mozzarella topped with grated Parmesan. Garnish with extra parsley and enjoy!

Zoodles ready to steam
Super yummy zoodles
This is a healthier alternative to pasta. The zoodles were both delicious and nutritious. I purchased the spiral slicer from Amazon for around $10. I am now hooked on Zoodles (Zucchini Noodles) and look forward to making a lot more recipes using other vegetables with the spiral slicer.

Happy Eating!

For further information on the Spiral Slicer, please visit: http://www.supremehomecook.com

-Allen/Two Frys

Sunday, March 6, 2016

Carline Phanor - Men Pa'w Gourmet Hot Sauce

Carline Phanor - Men Pa'w Gourmet Hot Sauce


Carline Phanor - Men Pa'w Gourmet Hot Sauce
Carline Phanor is owner and creator of Men P'aw Gourmet Hot Sauce. Based in South Florida, the versatile and successful product line has gained mass appeal to various cuisines and this is no surprise. Men Pa'w features rich and bold flavors in each of their products to satisfy all heat lovers. Men Pa'w recently introduced Hot Ketchup which is sure to be a huge sensation, and we are looking forward to reviewing it here soon. Read on to learn more about Carline Phanor and Men Pa'w Gourmet Hot Sauce.

Green Peppa Madness, Gourmet Blended Hot Condiment
and Reserved Special Red Sauce
Can you talk a little bit about your culinary experience and how this influenced you to create Men P'aw Gourmet Hot Sauce. Also, why did you decide to create your own hot sauce company?
I initially worked at a very touristic bar restaurant in Haiti where I gained experience and interest for food and exotic Caribbean spices. One day I decided to create my own hot sauce because I always enjoyed cooking and trying new things in the kitchen. The kitchen has always been my sanctuary. I simply enjoy cooking and my hot sauce came about without a recipe in mind, it was all inspirational. Its success among friends and family is what led me to open the company. Friends and family encouraged me to market it so that more people can enjoy it.

Hot Ketchup
Tell me about your product line and which Men P'aw hot sauce is your top seller?
My first two products that were introduced to the market were the Reserved Special Red Sauce and the Green Peppa Madness. Most recently we introduced the Hot Ketchup. All these product are condiments that can be used as a marinade and as an accompaniment to hors d'oeuvres. The top seller is the Reserve Special Red Sauce because of the heat level and the bold flavor. It is more pleasing to the palate of the Caribbean and Hispanic customers.
Hot Ketchup label
I am wondering what the name Men P'aw means and why you used it for the name of your company?
Men Pa'w Hot Sauce first started when my ex-husband gave me a handful of hot peppers, hence, the picture I have chosen for my bottles. Reluctantly, I planted them and to my amazement the South Florida weather complimented the growth of these Caribbean peppers of an abundant harvest. I began to give them away to friends and family until one fine day I had an epiphany. I took the peppers to the kitchen and whipped out my blender and began experimenting to create a hot sauce. When I found a blend to my liking, I had friends and family taste it accompanied by an array of appetizers. Without failure it was always a hit! With the name, Men Pa'w is a Haitian Creole word meaning "here's yours" the name was chosen because I wanted the words to reflect that sentiment. Thus, the Giving Hand became the trademark of the company. The success of my hot sauce has become a "must have" in the kitchen and dining room tables of families of different ethnicities in South Florida.

The lovely Carline Phanor of Men Pa'w Gourmet Hot Sauce
When you create your hot sauce recipes what drives your inspiration?
I created the hot sauce because of my love for hot and spicy sauces. Initially the creative juices in me reached out to satisfy my own taste buds. It was a need to create something in the hot sauce category that satisfied my palate. As previously mentioned, one day I had epiphany. I took the peppers to the kitchen and whipped out my blender and began experimenting to create a hot sauce. I had friends and family taste it accompanied by an array of appetizers. Without failure it was always a hit! With the successions of approval I took it one step further and decided that the name Men Pa'w would become my trademark.

Living in South Florida I know that there is a diverse food culture with cuisines from many regions. In what ways has this helped Men P'aw to be successful as it is?
The diversity of South Florida includes Caribbean, Central American and South Americans who all love hot sauces as it is already part of their culture. The authenticity and the blend of flavors in Men P'aw makes it attractive and irresistible.

Men Pa'w Gourmet Hot Sauce
Do you run all aspects of the business yourself and can you discuss what an average day for you is like?
My day to day activities of the business involves managing the online business and staying in touch with my distributors. Planning and making key financial decisions. Receiving feedback from customers and making changes accordingly. I also employ key financial, marketing and legal advisors.

Green Peppa Madness
Tell me about your experience being a woman proprietor in the hot sauce world? I think it is great to have more and more women owners of hot sauce companies. What advise can you offer a fellow woman interested in doing a hot sauce company?
I am part of a very competitive male dominated market and at times I have to work twice as hard to be recognized. Consistency, determination, perseverance, self confidence and NEVER take NO for an answer.

Do you have a Men P'aw sauce that is your favorite and what you love to pair it with?
My favorite is the Reserve Special Red Sauce and I usually pair it with chicken wings, BBQ meats, fish and as a marinade. I also use it as a regular condiment on a variety of foods.

Green Peppa Madness and Reserved Special Red Sauce
What is your favorite pepper and why?
The Chocolate Habanero pepper is my favorite because it has a richer flavor and a smokier aroma than the regular Orange Habanero. There is a wide variety of Chocolate Habanero peppers. They originated from Central America. Their original home is Mexico, Caribbean Islands, particularly Jamaica. Some varieties include Hot Chocolate Habanero from Senegal and the Congo Black Habanero. The heat of the Habanero peppers is rated by Scoville heat units; the average Habanero ranges from 100,000 - 350,000 units. The Chocolate Habanero ranges between 400,000 - 450,000 units. This is what provides the exceptional heat and aroma to the Men Pa'w sauce.

Beside the new spicy Hot Ketchup, do you have any other new products upcoming?
The Spicy Mustard will soon be another addition to the product line. The Spicy Orange Marmalade is also being developed to be used as a condiment or a glaze.

Reserved Special Red Sauce
What is your aspiration for the future of your hot sauce company?
To expand nationally and worldwide. I would like to introduce my brand of hot sauce to European and African markets.

Besides the website, where are your products available?
To name a few in Florida we sell at Bravo Supermarkets, Presidente, New Way Foods, Tropical Supermarket, Neighbors Supermarket, Norman Brothers, Joanna's Market Place, Chez Tito's Argentinian Restaurant, Le Lambi, Island Jamaican Restaurant, Jamrock Jamaican Restaurant. In New York City, we sell at Kalustyans Specialty Foods. In Canada, we sell at Espace Hublon, Boucherie BeauBien and Sauce Piquantes. My customers come back for more of that wild Aphrodisiac taste…I don't think any competitors will be able to match that!

For further information and to order Men Pa'w Gourmet Hot Sauce, please visit: http://www.menpawhotsauce.com/
Like Men Pa'w Gourmet Hot Sauce on Facebook:
https://www.facebook.com/Men-Paw-Gourmet-Hot-Sauce-LLC-174112092665152/

-Sophia/Two Frys

Sunday, February 21, 2016

Red Velvet Heart Cookies

Red Velvet Heart Cookies

Red Velvet Heart Cookies
I wanted to bake cookies and tint them red but without all the red food color. I found Lorann Professional Kitchen Red Velvet Bakery Emulsion and was so happy when I saw it used in this recipe from The Adventures of Sweet Sugarbelle. I made heart shape cookies using various heart cutters in different sizes. The texture of the cookie is chewy almost cake like, and tastes like red velvet in cookie form from the emulsion, vinegar and buttermilk powder. I share the recipe below.

Red Velvet Polka Dot Heart Cookies

Yield: 3 dozen 3 1/2 inch cookies

Ingredients
1 cup (2 sticks) Unsalted Butter, softened and each stick cut into 8 cubes

1 Extra Large Egg

3 tablespoons Milk

2 teaspoons Pure Vanilla Extract

1 tablespoon Lorann Professional Kitchen Red Velvet Bakery Emulsion

½ teaspoon Apple Cider Vinegar

2 cups Powdered/Confectioners' Sugar

½ cup Cocoa Powder

3 1/4 cups All Purpose Flour

1/4 cup Saco Cultured Buttermilk Powder

2 teaspoons Baking Powder

½ teaspoon Coarse Salt

Red Velvet Emulsion and Buttermilk Powder

Directions
Cut each stick of butter into 8 pieces.

Sift flour, cocoa powder, buttermilk powder, baking powder and salt in large bowl and combine with whisk or spatula; put aside.

Cream the butter and sugar together in a bowl of an electric mixer with paddle attachment on low to medium speed. Mix until incorporated, about 1-2 minutes.

Scrape sides of bowl with spatula and mix again for 5-10 seconds more.

Add egg and mix until incorporated. Scrape down bowl with spatula and mix again for another 10 seconds.

Add vanilla extract, red velvet emulsion, and milk and mix for 1 minute.

Slowly add flour mixture and mix on low speed for 1-2 minutes.

Add vinegar.

Continue to mix until dough clumps around paddle attachment.

Form dough into a ball, cover with plastic wrap, and cool in fridge for 1-2 hours or overnight.

Red-Red Velvet Heart Cookies

Heat oven to 350 degrees.

Take 1/4 of the dough, use rolling pin and roll out between 2 pieces of parchment paper to desired thickness and cut out shapes. I used various Heart shape cutters. Mix a little cocoa powder with flour to lightly coat the cutters. Repeat rolling the dough and cutting shapes until you have used it all.

Place cookie shapes on parchment lined baking sheet and space apart 2 inches. Put cookies in the freezer for 10 minutes before baking. They hold their shape when you do this.

Bake cookies for 9-11 minutes, or until center of cookie no longer looks wet. My cookies baked in 11 minutes.

Let cookies cool in baking sheet for 5 minutes and transfer to wire rack to cool completely, about 1 hour.

Let cookie sheets cool completely before you bake again. I put the cookie sheet in the freezer for 5 minutes. Repeat until you have baked all the cookies.

Turquoise-Red Velvet Heart Cookies

Large Batch Royal Icing
Ingredients
8 Egg Whites

8 teaspoons Lemon Juice, freshly squeezed

12 cups Powdered/Confectioners' Sugar, sifted

Directions
In a medium size bowl, whisk together the egg whites and lemon juice.

Transfer to stand or hand held mixer with paddle attachment and mix on high for 1-2 minutes.

With mixer speed on low, slowly add sifted sugar and beat on low until smooth.

If needed, you may add 1 teaspoon of water at a time until you reach the right consistency. Watch the Joy of Baking (link at the end) video for both Flooding Consistency and Piping Consistency Royal Icing. If you prefer a recipe using Meringue Powder, it is also available at this link.

White-Red Velvet Heart Cookies
I separated the icing in plastic containers with lids according to the different colors I needed for tinting.

I used Americolor Soft Gel Paste Food Color in Super White, Super Red, Fuschia, and Turquoise. I wanted the white bright, so added two drops of Super White.

Keep the containers covered until you are ready to color. Royal Icing hardens fast so keep it covered when not in use.

I transferred the icing immediately into Squeeze Bottles using a funnel to prevent it from spilling. Keep the squeeze bottle tips covered. If the Royal Icing hardens due to exposure to air, spray a little bit of water and shake bottle well holding the tip with your finger. Test the icing consistency on a paper towel before decorating the cookie.

Use a paintbrush or cookie stick to reach edges and use tip of cookie stick or a toothpick to pop any air bubbles.

I lined a cookie sheet with paper towels and placed the cookies on cooling tray over it.

I did the outlines first and waited about 15 minutes and then filled the cookies.

Pink-Red Velvet Heart Cookies

I used the following for decoration:
Wilton Valentine Mix Sprinkles
Wilton White Sparkling Sugar
Wilton Blue Sugar
Wilton Blue Sugar Pearls
Wilton White Sugar Pearls
Wilton Nonpareils
Silver Dragees
Celebration Sixlets Blue Candy Coated Chocolate

For further information:
For the Red Velvet Roll-Outs recipe, please visit The Adventures of Sweet Sugarbelle: http://www.sweetsugarbelle.com/2012/02/red-velvet-roll-outs-recipe/

For the Royal Icing recipe and video tutorial, please visit:
http://www.joyofbaking.com/RoyalIcing.html

Enjoy!

-Sophia/Two Frys

Coconut Heart Cookies

Coconut Heart Cookies

Coconut Heart Cookies
I love coconut in its many forms-water, oil, extract, and milk and was looking for a coconut cut out cookie that would hold its shape. This recipe from Glorious Treats exceeded my expectations. I made them for Valentine's Day and adjusted the recipe by adding 1 teaspoon coconut milk (Silk) and 1/8 teaspoon coarse salt. I purchased toasted coconut but provide directions on toasting coconut if you cannot find it. Try to buy unsweetened coconut flakes to control the sugar content. The texture of this coconut cookie is chewy, full of toasted coconut and there's a robust coconut flavor in every bite. I share the recipe below.

Coconut Heart Cookies

Yield: 18-20 3 inch cookies

Coconut Heart Cookies
Ingredients
1 cups (2 sticks) Unsalted Butter, softened and each stick cut into 8 cubes

1 cup Sugar

1 Extra Large Egg

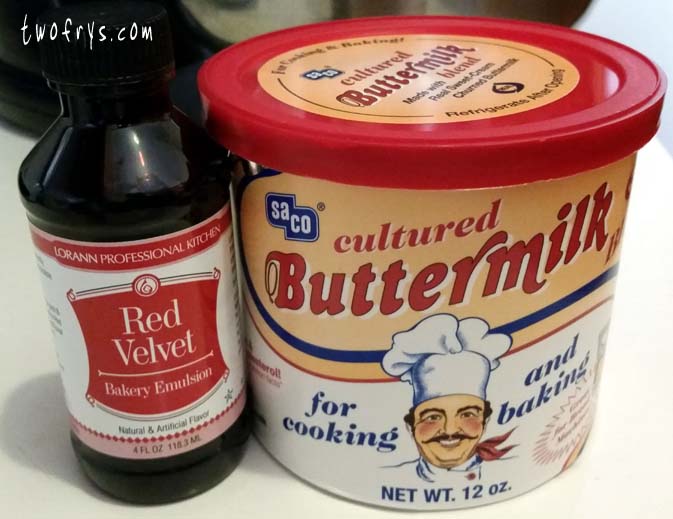
1 teaspoon Coconut  Milk (Silk)

1 teaspoon Pure Vanilla Extract

½ teaspoon Coconut Extract

2 ½ cups All Purpose Flour

1 teaspoon Baking Powder

1/8 teaspoon Coarse Salt

1 cup finely chopped Toasted Coconut (I used 100% Organic Unsweetened Toasted Coconut Flakes)

Yummy and pretty Coconut Heart Cookies

Toasted Coconut Directions
Directions
Heat oven to 350 degrees.

Place the shredded coconut on a baking sheet for about 10 minutes. Keep an eye on the coconut. It toasts up pretty quick. Place on cooling rack to cool completely.

When cooled, add toasted coconut in food processor (I used my Ninja) until it is in small pieces.

Add to flour mixture and combine with whisk or spatula.

This is the brand I buy. 

Toasted coconut in my Ninja processor

Coconut Cookies
Directions
Cut each stick of butter into 8 pieces.

Sift flour, baking powder and salt in large bowl and combine with whisk or spatula; put aside.

Cream the butter and sugar together in a bowl of an electric mixer with paddle attachment on low to medium speed. Mix until incorporated, about 1-2 minutes.

Scrape sides of bowl with spatula and mix again for 5-10 seconds more.

Add eggs one at a time. Scrape down bowl with spatula and mix again for another 10 seconds.

Add coconut milk, coconut and vanilla extracts and mix for 1 minute.

Royal Icing in Squeeze Bottles. The black was used in another cookie project forthcoming on the blog

Decorations I used
Slowly add toasted coconut flour mixture to bowl, and mix on low speed for 1-2 minutes. When dough clumps around paddle attachment, it is ready.

Form dough into a ball, cover with plastic wrap, and cool in fridge for 1-2 hours or overnight.

Heat oven to 350 degrees.

Take 1/2 of the dough, use rolling pin and roll out between 2 pieces of parchment paper to desired thickness and cut out shapes. I used various Heart shape cutters. Repeat rolling the dough and cutting shapes until you have used it all.

Pretty red heart
Place cookie shapes on parchment lined baking sheet and space apart 2 inches. Put cookies in the freezer for 10 minutes before baking. They hold their shape when you do this.

Bake cookies for 9-13 minutes, or until center of cookie no longer looks wet. My cookies baked in 13 minutes.

Let cookies cool in baking sheet for 5 minutes and transfer to wire rack to cool completely, about 1 hour.

Let cookie sheets cool completely before you bake again. I put the cookie sheet in the freezer for 5 minutes. Repeat until you have baked all the cookies.

Red Coconut Heart Cookies

Large Batch Royal Icing
Ingredients
8 Egg Whites

8 teaspoons Lemon Juice, freshly squeezed

12 cups Powdered/Confectioners' Sugar, sifted

Turquoise Coconut Heart Cookies

Directions
In a medium size bowl, whisk together the egg whites and lemon juice.

Transfer to stand or hand held mixer with paddle attachment and mix on high for 1-2 minutes.

With mixer speed on low, slowly add sifted sugar and beat on low until smooth.

If needed, you may add 1 teaspoon of water at a time until you reach the right consistency. Watch the Joy of Baking (link at the end) video for both Flooding Consistency and Piping Consistency Royal Icing. If you prefer a recipe using Meringue Powder, it is also available at this link.

Elegant Coconut Heart Cookies
I separated the icing in plastic containers with lids according to the different colors I needed for tinting.

I used Americolor Soft Gel Paste Food Color in Super White, Super Red, Fuchsia, and Turquoise. I wanted a bright white, so I added two drops of Super White.

Keep the containers covered until you are ready to color. Royal Icing hardens fast so keep it covered when not in use.

I transferred the icing immediately into Squeeze Bottles using a funnel to prevent it from spilling. Keep the squeeze bottle tips covered. If the Royal Icing hardens due to exposure to air, spray a little bit of water and shake bottle well holding the tip with your finger. Test the icing consistency on a paper towel before decorating the cookie.

Use a paintbrush or cookie stick to reach edges, and use tip of cookie stick or a toothpick to pop any air bubbles.

Fuchsia Coconut Heart Cookies
I lined a cookie sheet with paper towels and placed the cookies on cooling tray over it.

I did the outlines first and waited about 15 minutes and then filled the cookies.

I used the following for decoration:
Wilton Valentine Mix Sprinkles
Wilton White Sparkling Sugar
Wilton Blue Sugar
Wilton Blue Sugar Pearls
Wilton White Sugar Pearls
Wilton Nonpareils
Silver Dragees
Celebration Sixlets Blue Candy Coated Chocolate

For further information:
For the Coconut Cut Out Cookie recipe, please visit Glorious Treats: http://www.glorioustreats.com/2015/04/coconut-cut-out-cookies.html

For the Royal Icing recipe and video tutorial, please visit Joy of Baking:
http://www.joyofbaking.com/RoyalIcing.html

Enjoy!

-Sophia/Two Frys