Wednesday, November 2, 2016

Frankenstein Brownies

Frankenstein Brownies

Frankenstein Brownies
Close-up of Frankenstein Brownies
In my previous post Tombstone Brownies (recipe here), I made a double batch of the recipe for good reason. I bought Peeps Marshmallow Monsters and thought they would look adorable on top of green frosted brownies so I made it.

My corner piece
So yummy
Baked Brownie cooling
After the brownies cooled, I covered it with Pillsbury Funfetti Vibrant Green Vanilla Frosting. I placed the Peeps Marshmallow Monsters over the frosting, and sprinkled some of the confetti and CK Products Lime Green Sanding Sugar for some shimmer.

Frosted Brownies, Peeps, Confetti and Sanding Sugar
Peeps Marshmallow Monsters
Confetti and Sanding Sugar
These Frankenstein Brownies are so adorable and they taste yummy too. If you want to omit the frosting and sprinkles, just adhere the Peeps Monsters with a little corn syrup.

Enjoy!

-Sophia/Two Frys

Tuesday, November 1, 2016

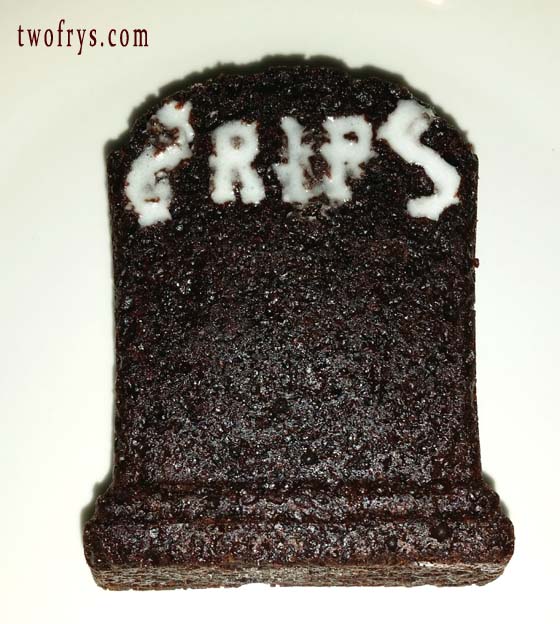
Tombstone Brownies

Tombstone Brownies


Tombstone removed from molds and cooling
I bought Wilton tombstone molds for Halloween baking and used a recipe from I Am Baker (link below) that I made back in January. The brownies are moist, dense and have a rich chocolate flavor profile. I made a double batch and added 1/2 cup of chocolate chips and 1/2 cup chopped walnuts. I share the recipe below.

Brownies baked and cooling

Ingredients
1 cup Granulated Sugar

1/3 cup Unsweetened Cocoa Powder

1/2 cup King Arthur All Purpose Flour

1/4 teaspoon Coarse Salt

1/4 teaspoon Baking Powder

1/2 cup Ghirardelli SemiSweet Chocolate Chips

1/2 cup Chopped Walnuts

2 Large Eggs

1/2 cup, 1 stick Butter, melted and cooled

1 teaspoon Pure Vanilla Extract

Tombstone Brownie

Directions
Heat oven to 350 degrees.

In a large bowl and using a whisk or spatula, sift together the sugar, cocoa powder, flour, salt and baking powder; set aside.

In a small pan on low, melt butter. Remove from heat and cool for about 10-15 minutes.

In a medium bowl, beat eggs and vanilla extract.

Tombstone Brownies
Pour egg mixture into cocoa powder mixture and stir with spatula.

Pour in melted butter into brownie mixture and incorporate with spatula until combined.

With a spatula gently fold in chocolate chips and walnuts.

Butter an 8-inch square baking pan and spread batter evenly using offset spatula or knife.

Tombstones going in the oven
Bake for 20-25 minutes or until toothpick inserted in center comes out clean.

Let brownie rest on cooling rack for 30-45 minutes. After 15 minutes, run a knife around the edges.

I filled some of the tombstones RIP and two swirl decorations with royal icing I had leftover from Halloween baking, but you can leave as is or sprinkle a little powdered sugar if you wish.

I prefer the brownie plain since it has chocolate chips and walnuts and that is flavor enough for me.

For this brownie recipe, please visit I Am Baker:
http://iambaker.net/homemade-brownie-mix/

Enjoy!

-Sophia/Two Frys

Monday, October 31, 2016

Day of the Dead Cookies

Day of the Dead Cookies

Day of the Dead - Dia de los Muertos Cookies
Feliz Dia de los Muertos - Happy Day of the Dead! To honor the dead, I baked Day of the Dead Sugar Skull Cookies using a vanilla sugar cookie recipe. Please go to Jack Skellington Cookies for the recipe and instructions. I bought Celebration Wafer Paper from Fancy Flours to make these cookies and use AmeriColor Gourmet Writer Food Decorating Pens. Each sheet has 8 designs. See Edgar Allan Poe Cookies for instructions on using wafer paper.

Wafer Paper sheet ready to color with edible markers
AmeriColor Gourmet Writer Food Decorating Pens and skully
I love the Celebration Paper used to make the sugar skull cookies. They are just like coloring in a book but with edible markers and on paper you can eat. It was time consuming to make these, but fun and relaxing.

Painted wafer paper ready to adhere to cookies
Wafer paper on cookies setting
I bought the black and white sugar skulls at Rite Aid for 50% off recently and love them!

Day of the Dead Cookies
When you cut the wafer paper be careful and do it slowly to avoid any breakage.

Day of the Dead Cookies
I colored the wafer sheet first and let them dry overnight and cut them the next morning.

Day of the Dead Cookies
For History of Day of the Dead & the Sugar Skull Tradition, visit:
http://www.mexicansugarskull.com/support/dodhistory.html

Enjoy!

-Sophia/Two Frys

Sunday, October 30, 2016

Halloween Cookies

Halloween Cookies

Halloween Cookies
Witch Hat, Cauldron, Witch Silhouette, Witch Broom
I made two batches of cookies for Halloween, vanilla and chocolate. The vanilla sugar cookie recipe is from Sweetopia, and I added 1 tablespoon of milk. This is the best tasting sugar cookie and my go to recipe for cutout cookies. For the chocolate sugar cookie recipe and instructions check out Holiday Sugar Cookies.

Skulls
Haunted House
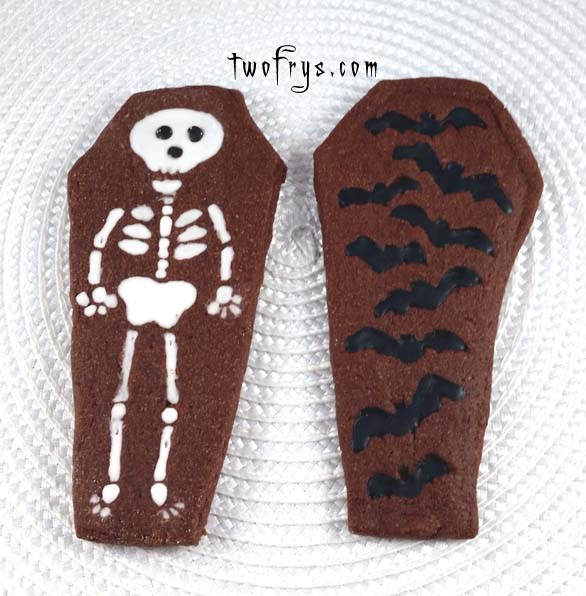
Tovolo Coffins: Skeleton and Bats

Vanilla Sugar Cookie 
Ingredients
2 cups Unsalted Butter, softened

2 cups Sugar

2 Extra Large Eggs

3 teaspoons Pure Vanilla Extract

1 tablespoon Milk

5 cups King Arthur All Purpose Flour

1 teaspoon Coarse Salt

Frankenstein and silly looking Dracula
Frankenstein
Silly looking Dracula

Directions
Sift flour and add salt. Combine with spatula. Put aside.

Cream butter and sugar in a hand held mixer or stand mixer with paddle attachment on low; 1-2 minutes.

Scrape sides of bowl with spatula and mix for a 10-15 seconds.

Moon
Ghosts
Candy Corn
Add eggs one at a time, mix until incorporated. Scrape sides of bowl and mix for 5-10 seconds.

Add milk and vanilla extract and mix on low until incorporated, about 20-25 seconds.

Slowly add flour mixture on low to combine. The dough is ready when it begins to clump around paddle attachment.

Bats
Ravens
Cats
Roll dough into ball, cover with plastic wrap and chill in fridge for 1-2 hours.

Cut dough into 4 cuts, leaving unused dough covered with plastic wrap until ready to use.

Preheat oven to 350 degrees.

Use two sheets of parchment paper with dough in between and roll with rolling pin until desired thickness is reached.

Place onto cookies sheets lined with parchment paper and put in freezer for 5 minutes. The cookies hold their shape when you do this.

Tombstones
Tombstones
Tombstones
Tombstones
Tombstones
Coffins
Bake 12-15 minutes or until the edges have slightly browned.

Wait 2-3 minutes before transferring cookies on cooling racks to complete cooling.

Decorate once cookies have cooled completely.

Witch Silhouette Cookies
Cauldrons
Witch Hats
Witch Brooms

Large Batch Royal Icing

Ingredients
8 Egg Whites

8 teaspoons Lemon Juice, freshly squeezed

12 cups Powdered/Confectioners' Sugar, sifted

1 tablespoon Clear Vanilla Extract

Directions
In a large bowl, sift powdered sugar, set aside.

In a bowl, add egg whites.

In a bowl, whisk together the egg whites and lemon juice.

Transfer to stand or hand held mixer with paddle attachment and mix on high for 1-2 minutes.

Add vanilla extract and mix for 5-10 seconds.

With mixer speed on low, slowly add sifted sugar and beat on low until smooth.

Sprinkles, decorations
Royal Icing, double batch
If needed, you may add 1 teaspoon of water at a time until you reach the right consistency. Watch the Joy of Baking (link at the end) video for both Flooding Consistency and Piping Consistency Royal Icing. If you prefer a recipe using Meringue Powder, it is also available at this link.

I separated the icing in plastic containers with lids according to the different colors I needed for tinting.

I used AmeriColor Soft Gel Paste Food Color.

Keep the containers covered until you are ready to color.

I transferred the icing immediately into Squeeze Bottles using a funnel to prevent spilling. If the Royal Icing hardens due to exposure to air, use a spray bottle and spray a little bit of water and shake bottle well holding the tip with your finger. Test the icing consistency on a paper towel before decorating the cookie.

I outlined the cookies and waited 1/2 hour and then filled them.

For the witch silhouette, I used wax paper and under it placed the silhouette. With the black border royal icing, I made a silhouette and let it dry overnight. I carefully peeled it off and applied a few drops of icing in the center of the cookie and gently placed the silhouette.

Use a paintbrush or cookie stick to reach edges and use tip of cookie stick or a toothpick to pop any air bubbles.

Let cookies dry overnight.

For further information:
Please visit, Sweetopia for the Vanilla Sugar Cookie Recipe:
http://sweetopia.net/2009/12/sugar-cookie-recipe/

Please visit, Joy of Baking for the Royal Icing Recipe and Video Tutorial:
http://www.joyofbaking.com/RoyalIcing.html

Enjoy!

-Sophia/Two Frys

Saturday, October 29, 2016

Jack Skellington Cookies

Jack Skellington Candy Mold Cookies

Jack Skellington and his Candy Mold Cookies
I recently purchased Disney Tim Burton's The Nightmare Before Christmas Ice Cube Tray to use as molds for Wilton White Candy Melts. Every Halloween my Jack Skellington doll comes out and stays out until the New Year. I love the film and the facial expressions of Jack Skellington are perfectly captured in this ice cube tray. The cookies were made using a vanilla sugar cookie recipe with white royal icing. See my Halloween Cookies post for the cookie recipe and royal icing recipe. I save a few cookies for this and used an oval and plaque cutter. Instructions on how to use candy melts follow below.

Jack Skellington Candy Mold Cookies
I put the candy melts in a disposable decorating bag and made a knot at the top. Use the defrost setting in your microwave for 1 minute and continue to do this at 30-second intervals until the candy is melted. My melts took 2 minutes to melt. Knead bag half way and when the candy melts, snip the bottom of bag and fill your mold.

Jack Skellington Ice Tray
Take mold and put in the freezer for 10-15 minutes. Gently tap on a table and push out one by one.

Wilton Bright White Candy Melts
Wilton Candy Melts melted

Enjoy!

-Sophia/Two Frys