Showing posts with label Cookie. Show all posts

Sunday, December 25, 2022

Christmas Cookies

 Christmas Cookies


The holiday season this year has meant a lot to me, and I am thankful to be alive. On October 31, 2021, I was hit by a car, and it took a long time for my foot to heal and feel better. I still deal with pain daily, but I am so ready to move forward with life, put this entire experience behind me, and hope for much better days and getting back to working on Two Frys. I made my best vanilla bean sugar cookie recipe and royal icing with meringue which I provide below. Wishing you all a very blessed holiday. Merry Christmas. Cherish the time you have with your family and loved ones. 


Vanilla Bean Sugar Cookie Ingredients

5 cups King Arthur All Purpose Flour

1 1/2 cups Vanilla Sugar

1 teaspoon Coarse Salt

2 cups (4 sticks) Unsalted Butter, softened

1 tablespoon Coconut Milk (Whole Milk, Almond, etc.)

2 Large Eggs

2 teaspoons Clear Vanilla Extract

1 tablespoon Vanilla Bean Paste


Directions

Whisk together flour and salt; set aside.

Cream butter and vanilla sugar in a handheld mixer or stand mixer with paddle attachment on low; 1-2 minutes. Do not overmix.

Scrape sides of bowl with spatula and mix for 10 seconds.

Add eggs one at a time and mix until incorporated.

Scrape sides of bowl and mix for 5 seconds.

Add coconut milk, vanilla extract, and vanilla bean paste, and mix on low until incorporated; about 20-25 seconds.

Scrape sides of bowl and mix for 5 seconds.

Turn off mixer and add the flour mixture, and cover mixer with kitchen towel, and turn mixer on low speed and incorporate. 

The dough is ready when it begins to clump around paddle attachment.

Form into a disk shape and cover with plastic wrap and chill in fridge for 1-3 hours or overnight. 


Heat oven to 350°F.

Use two sheets of parchment paper with dough in between and roll with rolling pin until desired thickness is reached.

Take round cutter and make shapes. Repeat until you use all the dough.

Place onto baking sheets lined with parchment paper and put in freezer for 30 minutes. The cookies hold their shape when you do this.

Bake 12-15 minutes or until the edges have slightly browned. 

Wait 5 minutes before transferring cookies on cooling racks to complete cooling.

Decorate once cookies have cooled completely.


Royal Icing (with Meringue Powder)

Yield: 8 cups


Ingredients

2 pounds Powdered Sugar 

1/3 cup Meringue Powder 

1/2 cup Room Temperature Water (plus extra if you need to thin the icing)

2 teaspoons Clear Vanilla Extract

1 tablespoon Light Corn Syrup


Directions

In a large bowl, sift the powdered sugar; set aside.

Add meringue powder, room temperature water, and vanilla extract in mixer with whisk attachment and mix on high for 1 minute. Do not overmix.

Turn off mixer and switch to paddle attachment. 

Add the powdered sugar, cover the mixer with a kitchen towel, and turn the mixer to low speed and slowly add light corn syrup and then beat on high speed until smooth; about 1-2 minutes.

The consistency using this recipe is thick and great for borders, stenciling, writing on cookies, and detail work.

If you need a both a border and flood-like consistency keep reading below.


If you only need flood consistency icing, add small amounts of room temperature water and mix for 5-10 seconds, and repeat until you reach the right consistency. Be careful that your icing does not become too runny, or you may have to start over.

Keep the containers or Tupperware/Pyrex covered until you are ready to color since royal icing hardens fast.

I use Soft Gel Paste Food Color in various colors.

Use 1-2 drops at a time until you reach the desired color.

Once you have the colors completed in each container, take the amount you need of the border icing consistency and place into icing bottles, tipless bags, or pastry bags fitted with tips.

Then with the remainder of the icing, add small amounts of room temperature water to make flood consistency icing. Stir together with a small spatula and repeat until you have the consistency you need. 


A little water goes a long way. This part takes some practice. Then transfer the flood icing into icing bottles, tipless bags, or bags fitted with tips.

I find doing it this way is easiest as you end up with the same color for both the border/detail work and flood consistency.

Decorate your cookies.

If you are adding layers let the first layer dry completely. 

Use a cookie stick or toothpick to reach edges, and to pop any air bubbles in the icing. 

Let the cookies dry overnight.

Keep in mind if you are baking and it is humid, you may need more time for the cookies to dry.

-Sophia/Two Frys

Sunday, September 4, 2022

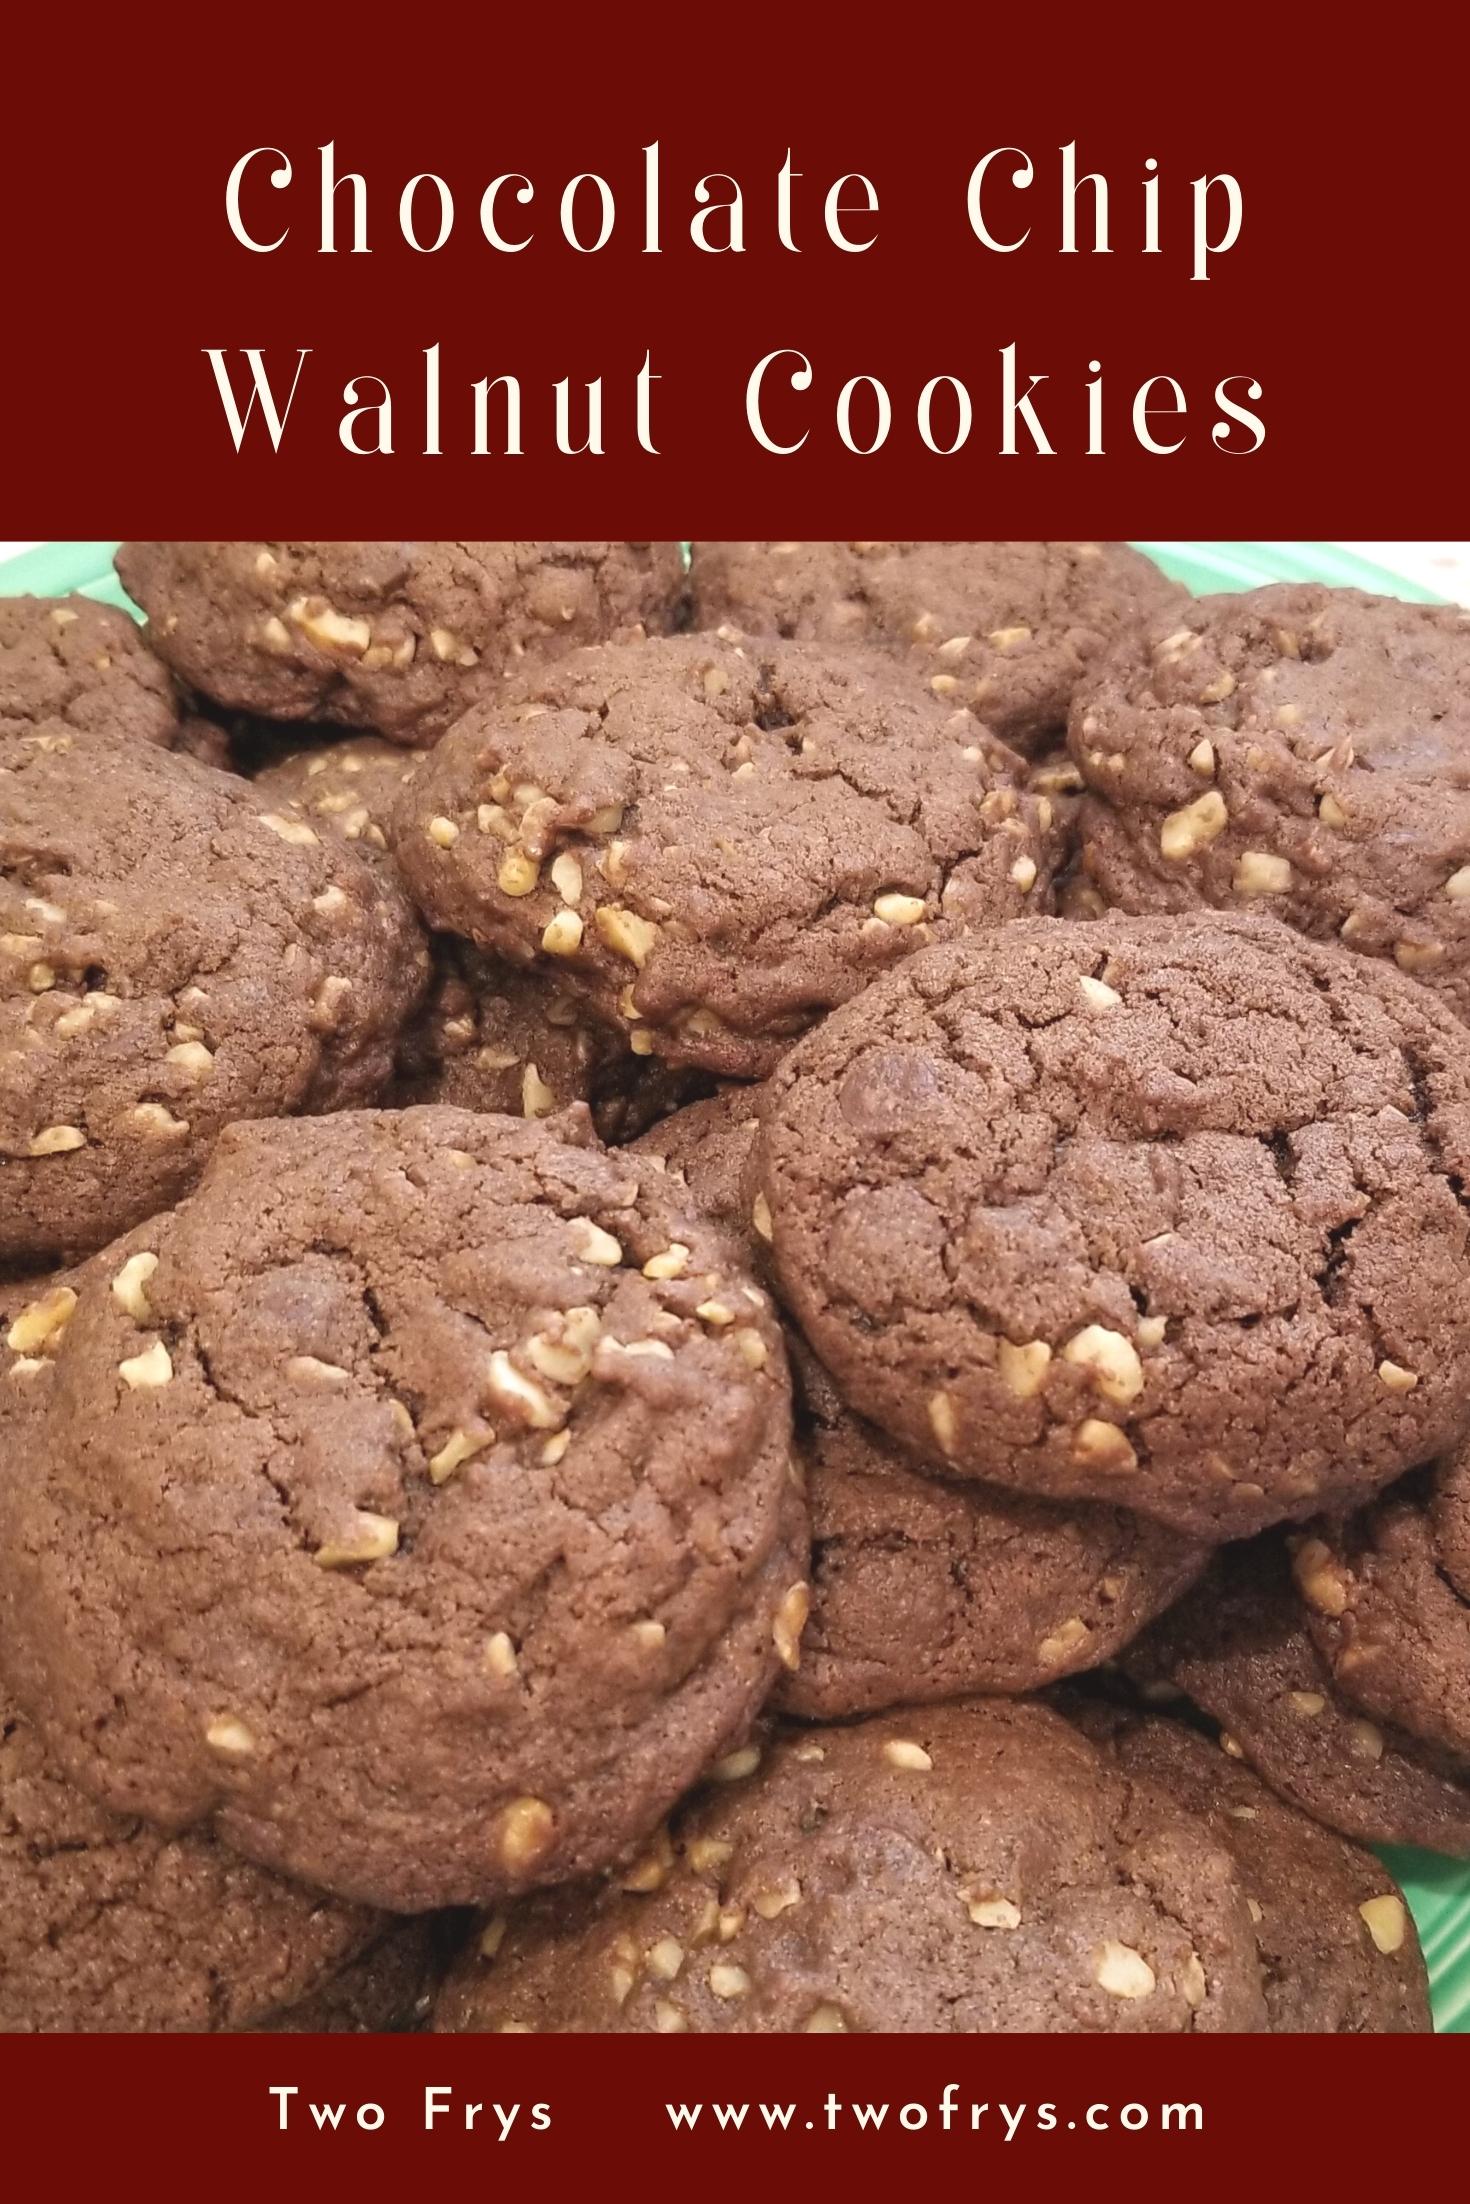
Chocolate Chip Walnut Cookies

 Chocolate Chip Walnut Cookies


I love chocolate and cookies with dark chocolate chips and nuts are a favorite of mine. I baked these cookies when visiting my in-laws. The cookies were so tender and cake like almost and full of rich chocolate flavor and not too sweet. The finely chopped walnuts gave the cookies a great crunch. The recipe comes from the back of the bag of Hershey's Special Dark Chocolate Chips. 


Yield: 2 1/2 Dozen Cookies

Ingredients

2 cups All-Purpose Flour

1/2 cup Hershey's Cocoa

1 teaspoon Baking Soda

1/2 teaspoon Coarse Salt

3/4 cup Sugar

3/4 cup Light Brown Sugar, packed

1 cup (2 sticks) Unsalted Butter, softened

2 Large Eggs

1 teaspoon Pure Vanilla Extract

1 package (12 oz.) Hershey's Special Dark Chocolate Chips

1 cup Walnuts, finely chopped (optional)


Directions

Heat oven to 375°F.

Line baking sheets with parchment paper.

In a large bowl, whisk together the flour, cocoa, baking soda, and salt; set aside.

In a medium size bowl, whisk together granulated sugar and light brown sugar; set aside.


Using a mixer with the paddle attachment on medium speed, cream sugars and butter until light and fluffy, 1-2 minutes.

Add eggs one at a time, vanilla extract, and mix on medium speed until incorporated.

Turn to low speed, and gradually add flour mixture and mix until combined.


With a spatula, fold in chocolate chips and walnuts.

Using a tablespoon or cookie scoop, form and place dough balls on baking sheets spacing 2 inches apart.

Bake for 8 to 10 minutes or until cookies are set.

Wait 3 minutes and then transfer to wire racks to cool or if you are like me enjoy some cookies warm. 

-Sophia/Two Frys

Saturday, October 30, 2021

Headless Horseman Cookies

 Headless Horseman Cookies


You may know well the tale of the Headless Horseman in Washington Irving's The Legend of Sleepy Hollow. I live about one hour from the quaint Village of Sleepy Hollow in Tarrytown, NY, and it is a place that is special to me and I recommend you visit for a great experience especially around this time of year. Unfortunately due to the COVID-19 pandemic, many events are not happening this year. I hope to visit Sleepy Hollow again perhaps next year with the hope things are back to normal (or as normal as can be) and all the events return. In the meantime, read Irving's classic. I have read this book several times and also love the film of the same name. This is my Headless Horseman cookie in honor of Washington Irving's The Legend of Sleepy Hollow. Happy Halloween!


Suggested links:

Village of Sleepy Hollow New York: https://www.sleepyhollowny.gov/

Visit Sleepy Hollow: https://visitsleepyhollow.com/

What Inspired 'The Legend of Sleepy Hollow'?: https://www.history.com/news/legend-sleepy-hollow-headless-horseman

Order the Headless Horseman Two Piece Halloween Cookie Cutters from SugarDashCo on Etsy: https://www.etsy.com/listing/1064829073/headless-horseman-two-piece-halloween

Sleepy Hollow, Headless Horseman Centerpiece, Paper Lantern: https://www.etsy.com/listing/1080908811/sleepy-hollow-halloween-home-decor

-Sophia/Two Frys

Sunday, August 15, 2021

Five Nights at Freddy's Cookies

Five Nights at Freddy's (FNAF) Cookies

My nephew turned 7 recently and he is a huge fan of Five Nights at Freddy's (FNAF) Cookies so my sister in law used this theme for his birthday party. I made cookies, she made an awesome FNAF cake and cupcakes, and her best friend made lots of desserts. For the cookies, I use wafer paper, edible markers, and an assortment of sprinkles. The party was held at the Bronx Burger House and it was a very loud and fun day! This vanilla bean sugar cookie is superb. The cookie texture is chewy and has a prominent vanilla flavor from the vanilla sugar, vanilla extract, and vanilla bean paste. I use an egg and dairy free icing for this recipe. 


Vanilla Bean Sugar Cookie Ingredients

5 cups King Arthur All Purpose Flour

1 1/2 cups Vanilla Sugar

1 teaspoon Coarse Salt

2 cups (4 sticks) Unsalted Butter, softened

1 tablespoon Coconut Milk (or any dairy free brand you prefer)

2 Large Eggs

2 teaspoons Clear Vanilla Extract

1 tablespoon Vanilla Bean Paste


Directions

Whisk together flour and salt; set aside.

Cream butter and vanilla sugar in a hand held mixer or stand mixer with paddle attachment on low; 1-2 minutes. Do not overmix.

Scrape sides of bowl with spatula and mix for 10 seconds.

Add eggs one at a time and mix until incorporated.

Scrape sides of bowl and mix for 5 seconds.

Add coconut milk, vanilla extract, and vanilla bean paste, and mix on low until incorporated; about 20-25 seconds.

Scrape sides of bowl and mix for 5 seconds.

Turn off mixer and add the flour mixture, and cover mixer with kitchen towel, and turn mixer on low speed and incorporate. 


The dough is ready when it begins to clump around paddle attachment.

Form into a disk shape and cover with plastic wrap and chill in fridge for 1-3 hours or overnight. I chilled the dough for 2 hours.

Heat oven to 350°F.


Use two sheets of parchment paper with dough in between and roll with rolling pin until desired thickness is reached.

Take round cutter and make shapes. Repeat until you use all the dough.

Place onto baking sheets lined with parchment paper, and put in freezer for 30 minutes. The cookies hold their shape when you do this.


Bake 12-15 minutes or until the edges have slightly browned. 

Wait 5 minutes before transferring cookies on cooling racks to complete cooling.

Decorate once cookies have cooled completely.


Egg-Dairy Free Icing (Double recipe if you have more than 40 cookies)

6 cups Powdered/Confectioners' Sugar, sifted

1/2 cup Coconut Milk + 1 tablespoon extra (for flooding cookies)

1/4 cup Light Corn Syrup

2 teaspoons Clear Vanilla Extract


Directions

In a large bowl, sift powdered sugar; set aside.

Using stand or hand held mixer with paddle attachment on medium-high speed, combine sugar and 1/4 cup of coconut milk and mix for 1-2 minutes until smooth.

Add remaining 1/4 cup of milk one teaspoon at a time until you reach the consistency you need.   

Add corn syrup, vanilla extract, and mix for 10 seconds.


I separate the icing in plastic containers with lids according to how many different colors needed for tinting. This time I only needed white so no tinting was needed.

Keep the containers covered until you are ready to color.

Transfer the icing immediately into squeeze bottles, pastry bags fitted with desired tips, or tipless bags.

Outline each cookie and then immediately flood it.

Let cookies dry for 6-8 hours or overnight.


Wafer Paper Ingredients

Iced cookies

Cut wafer paper designs

Craft scissors

Craft brush

1/4 cup Light Corn Syrup (to adhere wafer paper to icing)


Directions

Using a craft knife, carefully cut the designs carefully. Wafer paper is very thin and will tear easily. 

Make sure the icing is completely dry.

Add light corn syrup to a small bowl. 


Dip the brush into the syrup and gently cover the undecorated side of the wafer paper design, and gently adhere onto each cookie. Run your finger around the edge of the design and press gently. Repeat this step until you adhere all the wafer paper designs. 

Let the cookies set overnight so they do not stick together and so the wafer paper does not tear.

I purchased the wafer paper from toppers.usa: https://www.ebay.com/usr/toppers.usa

For the icing recipe visit, The Slow Roasted Italian: http://www.theslowroasteditalian.com/2013/12/best-tasting-sugar-cookie-icing-recipe.html

Enjoy!

-Sophia/Two Frys

Saturday, April 10, 2021

Easter Cookies

 Easter Cookies

I hope everyone that celebrates Easter had a wonderful one. This was the first time in over a year since COVID-19 that Allen and I were able to go to a small family gathering. It was great spending time with everyone, and I hope things get back to normal soon. Now onto cookies and I mean it when I say these are the best vanilla sugar cookies I ever tasted. The ingredients feature vanilla 3 ways: vanilla bean paste, vanilla extract, and vanilla sugar. The taste is a perfect vanilla flavor profile, and the cookie texture is chewy but firm. Since my nephew has an egg allergy, I did not use royal icing but an egg-dairy free icing. I love this icing as it has a lovely shine, tastes great, and have used it for many years. I highly recommend this recipe alternative if you cannot use egg whites. Happy Spring and stay safe!


Vanilla Sugar Cookie Ingredients
5 cups All Purpose Flour

1 1/2 cups Vanilla Sugar

1 teaspoon Coarse Salt

2 cups (4 sticks) Unsalted Butter, softened

1 tablespoon Coconut Milk Cream (or Almond or other dairy free blend)

2 Large Eggs

2 teaspoons Clear Vanilla Extract

1 tablespoon Vanilla Bean Paste


Directions
Whisk together flour and salt; set aside. 

Cream butter and vanilla sugar in a hand held mixer or stand mixer with paddle attachment on low; 1-2 minutes. Do not overmix.

Scrape sides of bowl with spatula and mix for 10 seconds.

Add eggs one at a time, mix until incorporated. Scrape sides of bowl and mix for 5 seconds.


Add coconut milk, vanilla extract, and vanilla bean paste, and mix on low until incorporated; about 20-25 seconds.

Scrape sides of bowl and mix for 5 seconds.

Turn off mixer and add the flour mixture, and cover mixer with kitchen towel, and turn mixer on low speed and incorporate. 

The dough is ready when it begins to clump around paddle attachment.

Form into a disk shape and cover with plastic wrap and chill in fridge for 1-3 hours or overnight. I chilled the dough for 2 hours.


Heat oven to 350°F.

Use two sheets of parchment paper with dough in between and roll with rolling pin until desired thickness is reached.

Take cutters and make shapes. Repeat until you use all the dough.

Place onto baking sheets lined with parchment paper, and put in freezer for 20-30 minutes. The cookies hold their shape when you do this.


Bake 12-15 minutes or until the edges have slightly browned. 

Wait 2-3 minutes before transferring cookies on cooling racks to complete cooling.

Decorate once cookies have cooled completely.


Egg-Dairy Free Icing (Double recipe if you have more than 40 cookies)

6 cups Powdered/Confectioners' Sugar, sifted

1/2 cup Coconut Milk + 1 tablespoon extra (for flooding cookies) (or Almond)

1/4 cup Light Corn Syrup

2 teaspoons Clear Vanilla Extract 


Directions
In a large bowl, sift powdered sugar; set aside.

Using stand or hand held mixer with paddle attachment on medium-high speed, combine sugar and 1/4 cup of coconut milk and mix for 1-2 minutes until smooth.

Add remaining 1/4 cup of milk one teaspoon at a time until you reach the consistency you need.   

Add corn syrup, vanilla extract, and mix for 10 seconds.


I separate the icing in plastic containers with lids according to how many different colors needed for tinting.

Keep the containers covered until you are ready to color.

Transfer the icing immediately into squeeze bottles, pastry bags fitted with desired tips, or tipless bags.


Outline each cookie and then immediately flood it.

Decorate as desired.

Let cookies dry overnight.
The flower designs were inspired by, The Cake Blog:

Enjoy!

-Sophia/Two Frys