Showing posts with label Sweet. Show all posts

Sunday, December 25, 2022

Christmas Cookies

 Christmas Cookies


The holiday season this year has meant a lot to me, and I am thankful to be alive. On October 31, 2021, I was hit by a car, and it took a long time for my foot to heal and feel better. I still deal with pain daily, but I am so ready to move forward with life, put this entire experience behind me, and hope for much better days and getting back to working on Two Frys. I made my best vanilla bean sugar cookie recipe and royal icing with meringue which I provide below. Wishing you all a very blessed holiday. Merry Christmas. Cherish the time you have with your family and loved ones. 


Vanilla Bean Sugar Cookie Ingredients

5 cups King Arthur All Purpose Flour

1 1/2 cups Vanilla Sugar

1 teaspoon Coarse Salt

2 cups (4 sticks) Unsalted Butter, softened

1 tablespoon Coconut Milk (Whole Milk, Almond, etc.)

2 Large Eggs

2 teaspoons Clear Vanilla Extract

1 tablespoon Vanilla Bean Paste


Directions

Whisk together flour and salt; set aside.

Cream butter and vanilla sugar in a handheld mixer or stand mixer with paddle attachment on low; 1-2 minutes. Do not overmix.

Scrape sides of bowl with spatula and mix for 10 seconds.

Add eggs one at a time and mix until incorporated.

Scrape sides of bowl and mix for 5 seconds.

Add coconut milk, vanilla extract, and vanilla bean paste, and mix on low until incorporated; about 20-25 seconds.

Scrape sides of bowl and mix for 5 seconds.

Turn off mixer and add the flour mixture, and cover mixer with kitchen towel, and turn mixer on low speed and incorporate. 

The dough is ready when it begins to clump around paddle attachment.

Form into a disk shape and cover with plastic wrap and chill in fridge for 1-3 hours or overnight. 


Heat oven to 350°F.

Use two sheets of parchment paper with dough in between and roll with rolling pin until desired thickness is reached.

Take round cutter and make shapes. Repeat until you use all the dough.

Place onto baking sheets lined with parchment paper and put in freezer for 30 minutes. The cookies hold their shape when you do this.

Bake 12-15 minutes or until the edges have slightly browned. 

Wait 5 minutes before transferring cookies on cooling racks to complete cooling.

Decorate once cookies have cooled completely.


Royal Icing (with Meringue Powder)

Yield: 8 cups


Ingredients

2 pounds Powdered Sugar 

1/3 cup Meringue Powder 

1/2 cup Room Temperature Water (plus extra if you need to thin the icing)

2 teaspoons Clear Vanilla Extract

1 tablespoon Light Corn Syrup


Directions

In a large bowl, sift the powdered sugar; set aside.

Add meringue powder, room temperature water, and vanilla extract in mixer with whisk attachment and mix on high for 1 minute. Do not overmix.

Turn off mixer and switch to paddle attachment. 

Add the powdered sugar, cover the mixer with a kitchen towel, and turn the mixer to low speed and slowly add light corn syrup and then beat on high speed until smooth; about 1-2 minutes.

The consistency using this recipe is thick and great for borders, stenciling, writing on cookies, and detail work.

If you need a both a border and flood-like consistency keep reading below.


If you only need flood consistency icing, add small amounts of room temperature water and mix for 5-10 seconds, and repeat until you reach the right consistency. Be careful that your icing does not become too runny, or you may have to start over.

Keep the containers or Tupperware/Pyrex covered until you are ready to color since royal icing hardens fast.

I use Soft Gel Paste Food Color in various colors.

Use 1-2 drops at a time until you reach the desired color.

Once you have the colors completed in each container, take the amount you need of the border icing consistency and place into icing bottles, tipless bags, or pastry bags fitted with tips.

Then with the remainder of the icing, add small amounts of room temperature water to make flood consistency icing. Stir together with a small spatula and repeat until you have the consistency you need. 


A little water goes a long way. This part takes some practice. Then transfer the flood icing into icing bottles, tipless bags, or bags fitted with tips.

I find doing it this way is easiest as you end up with the same color for both the border/detail work and flood consistency.

Decorate your cookies.

If you are adding layers let the first layer dry completely. 

Use a cookie stick or toothpick to reach edges, and to pop any air bubbles in the icing. 

Let the cookies dry overnight.

Keep in mind if you are baking and it is humid, you may need more time for the cookies to dry.

-Sophia/Two Frys

Thursday, November 24, 2022

Pumpkin Pie

 Pumpkin Pie


The aroma in our kitchen from this pumpkin pie baking in the oven is a favorite during the holiday season. This is the original famous Libby's Pumpkin Pie recipe found on the back of Libby's Pure Pumpkin. The creamy texture and the warm spices with the crisp bite of the crust is superb. Have a wonderful Thanksgiving and be grateful for the many blessings you have in your life.


Pumpkin Pie Ingredients

1 can (12 oz) NESTLE CARNATION Evaporated Milk

1 can (15 oz) LIBBY's 100% Pure Pumpkin

2 X-Large Eggs

3/4 cup Lightly packed Granulated Sugar

1/2 teaspoon Coarse Salt

1 teaspoon ground Cinnamon

1/2 teaspoon ground Nutmeg

1/2 teaspoon ground Ginger

1/4 teaspoon ground Cloves

Pie Crust homemade or store bought (I used Marie Callender's Deep Dish Pastry Pie Shell)


Pumpkin Pie Directions

Heat oven to 425°F.

In a medium sized bowl, add sugar, salt, cinnamon, nutmeg, ginger and cloves and combine with a spatula. Set aside for now.

In a large bowl, beat eggs with whisk. Add pumpkin and sugar-spice mixture and combine with spatula.

Gradually add evaporated milk stirring with spatula just until combined.

Let pie crust come to room temperature and place into glass or ceramic pie dish and press sides and bottom firmly.

Crimp crust or decorate as you wish.

Add in freezer for 15 minutes so pie crust holds its shape.

Remove from freezer and pour pumpkin pie mixture into pie shell.

Bake pumpkin pie at 425°F for 15 minutes.

After the first 15 minutes of baking, reduce oven temperature to 350°F, place pie shield (I use Mrs. Anderson's Pie Crust Shield) or cut strips of aluminum foil over crust.

Bake for another 40 to 55 minutes until cake tester or toothpick comes out clean.

Cool pumpkin pie on a wire rack for 2 hours before serving.

After first 20 minutes of cooling, place decorative cutouts gently on top of pie.

If not serving right away, carefully cover with foil and refrigerate until you are ready to serve it.


Crust Cutout Ingredients:

1 homemade or store-bought pie crust at room temperature


Cutout Directions:

Roll out 1 pie crust and make as many shape cutouts of your choice.

Place cutouts on a cookie sheet.

Place crust cutouts in 425°F oven for 7 to 9 minutes until crust is golden brown. 

Remove and place on wire rack to cool.

-Sophia/Two Frys


Sunday, September 4, 2022

Chocolate Chip Walnut Cookies

 Chocolate Chip Walnut Cookies


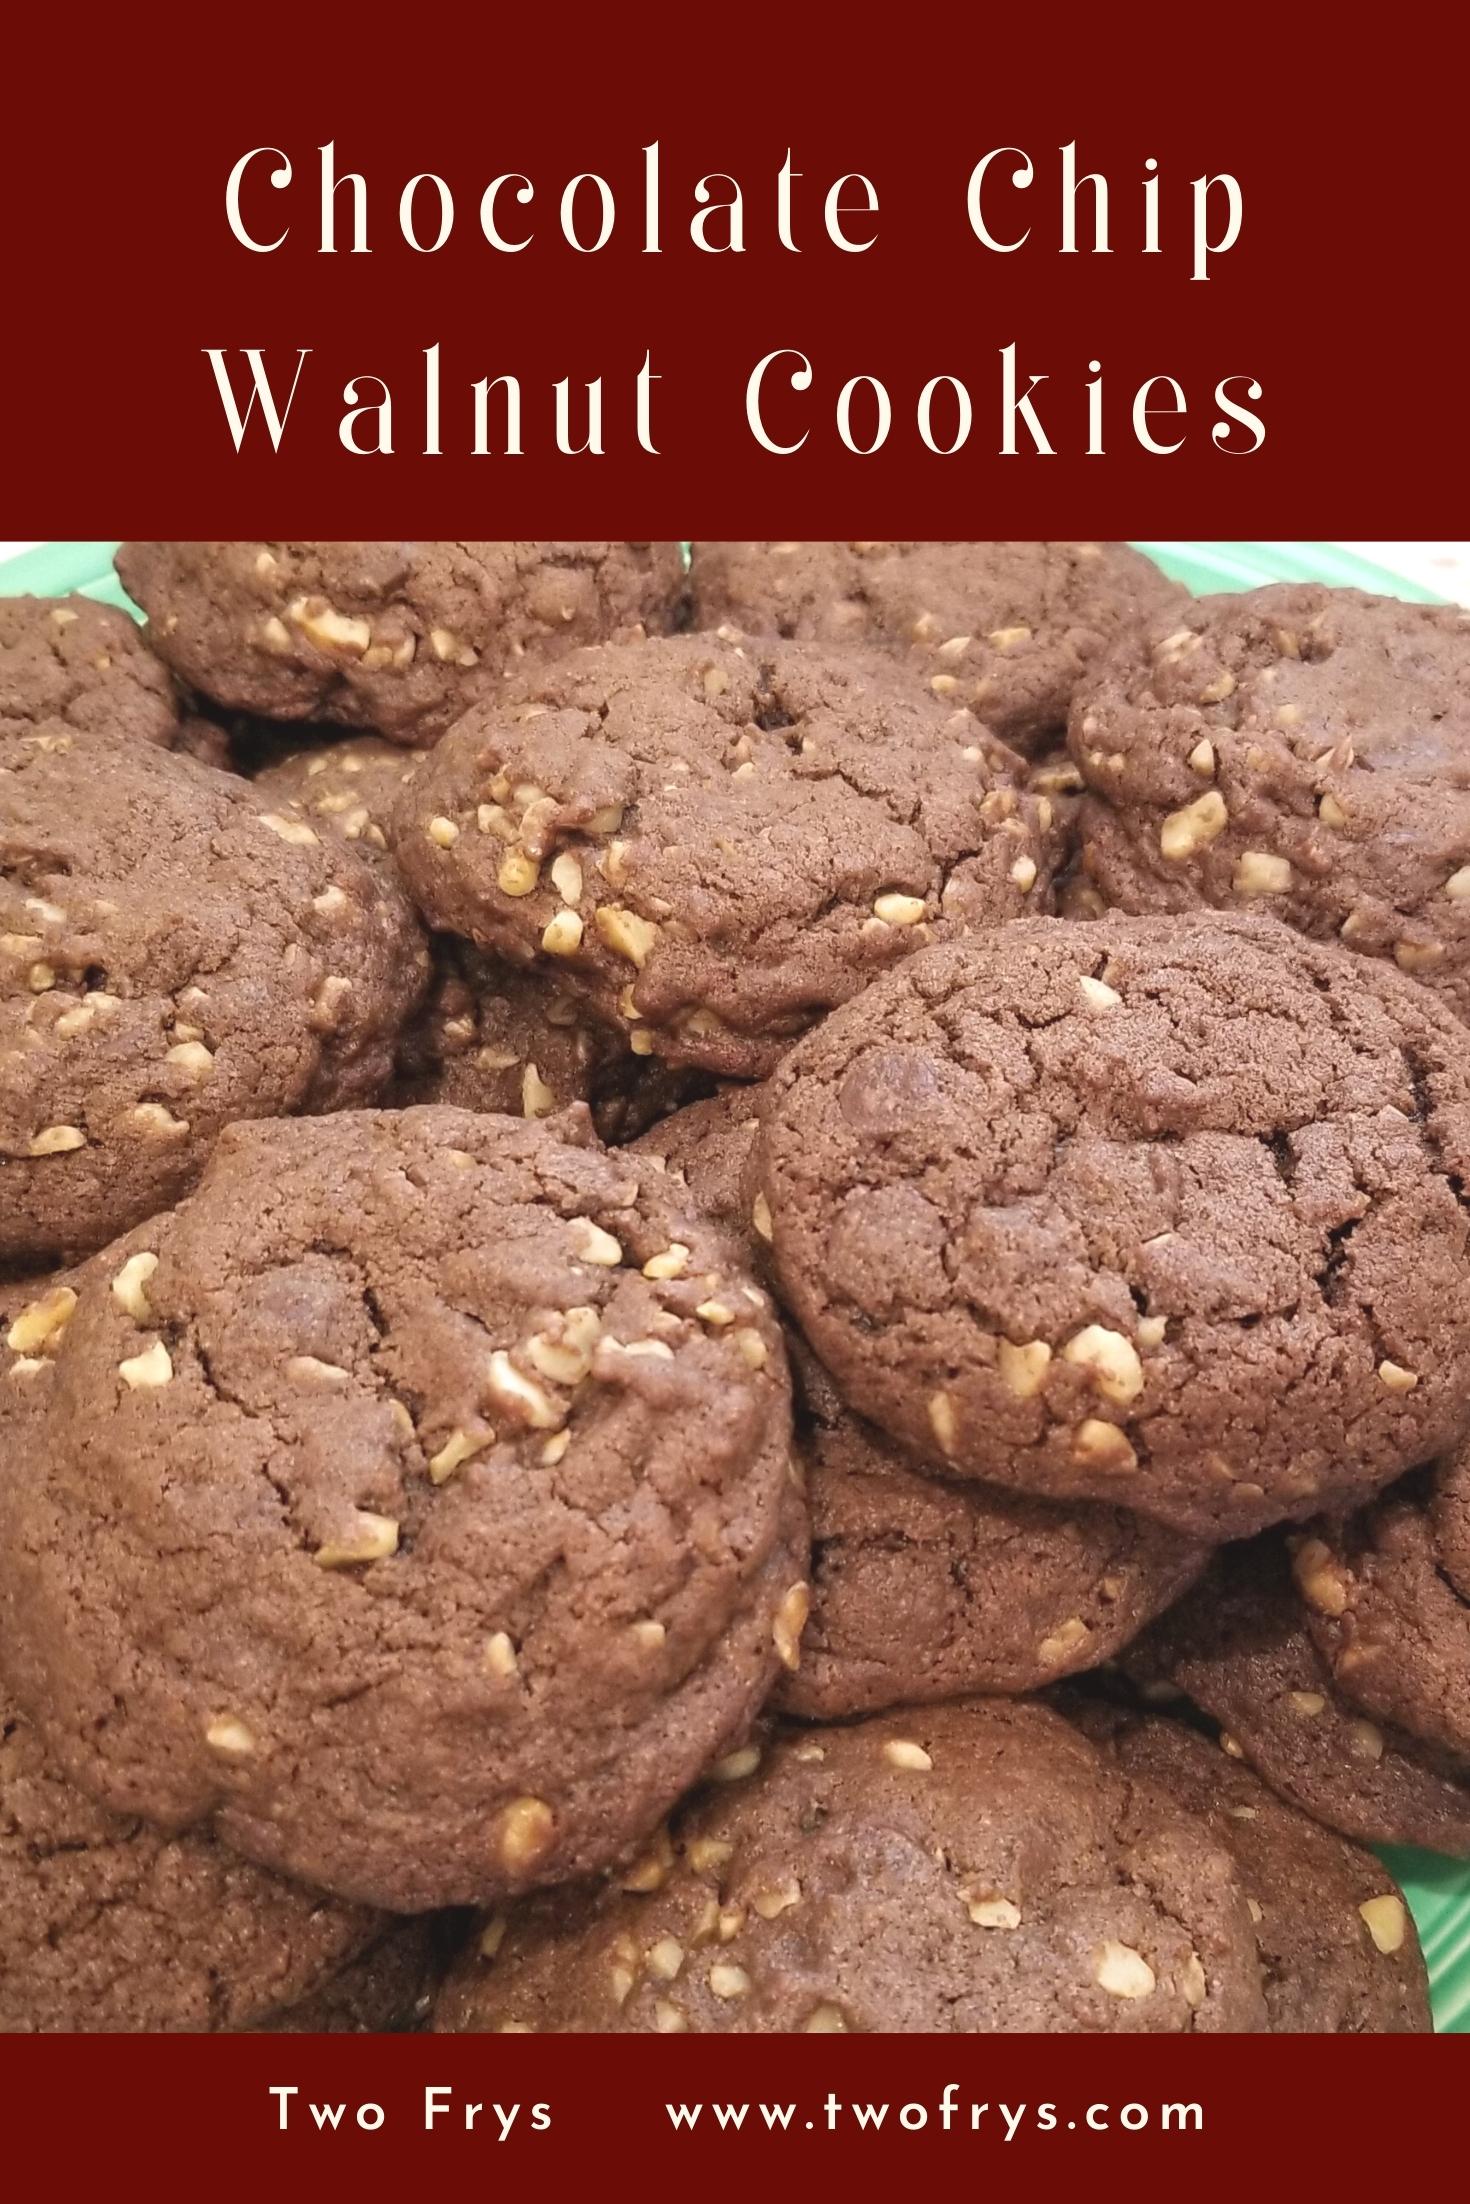
I love chocolate and cookies with dark chocolate chips and nuts are a favorite of mine. I baked these cookies when visiting my in-laws. The cookies were so tender and cake like almost and full of rich chocolate flavor and not too sweet. The finely chopped walnuts gave the cookies a great crunch. The recipe comes from the back of the bag of Hershey's Special Dark Chocolate Chips. 


Yield: 2 1/2 Dozen Cookies

Ingredients

2 cups All-Purpose Flour

1/2 cup Hershey's Cocoa

1 teaspoon Baking Soda

1/2 teaspoon Coarse Salt

3/4 cup Sugar

3/4 cup Light Brown Sugar, packed

1 cup (2 sticks) Unsalted Butter, softened

2 Large Eggs

1 teaspoon Pure Vanilla Extract

1 package (12 oz.) Hershey's Special Dark Chocolate Chips

1 cup Walnuts, finely chopped (optional)


Directions

Heat oven to 375°F.

Line baking sheets with parchment paper.

In a large bowl, whisk together the flour, cocoa, baking soda, and salt; set aside.

In a medium size bowl, whisk together granulated sugar and light brown sugar; set aside.


Using a mixer with the paddle attachment on medium speed, cream sugars and butter until light and fluffy, 1-2 minutes.

Add eggs one at a time, vanilla extract, and mix on medium speed until incorporated.

Turn to low speed, and gradually add flour mixture and mix until combined.


With a spatula, fold in chocolate chips and walnuts.

Using a tablespoon or cookie scoop, form and place dough balls on baking sheets spacing 2 inches apart.

Bake for 8 to 10 minutes or until cookies are set.

Wait 3 minutes and then transfer to wire racks to cool or if you are like me enjoy some cookies warm. 

-Sophia/Two Frys

Sunday, August 21, 2022

Coconut Cake

 Coconut Cake

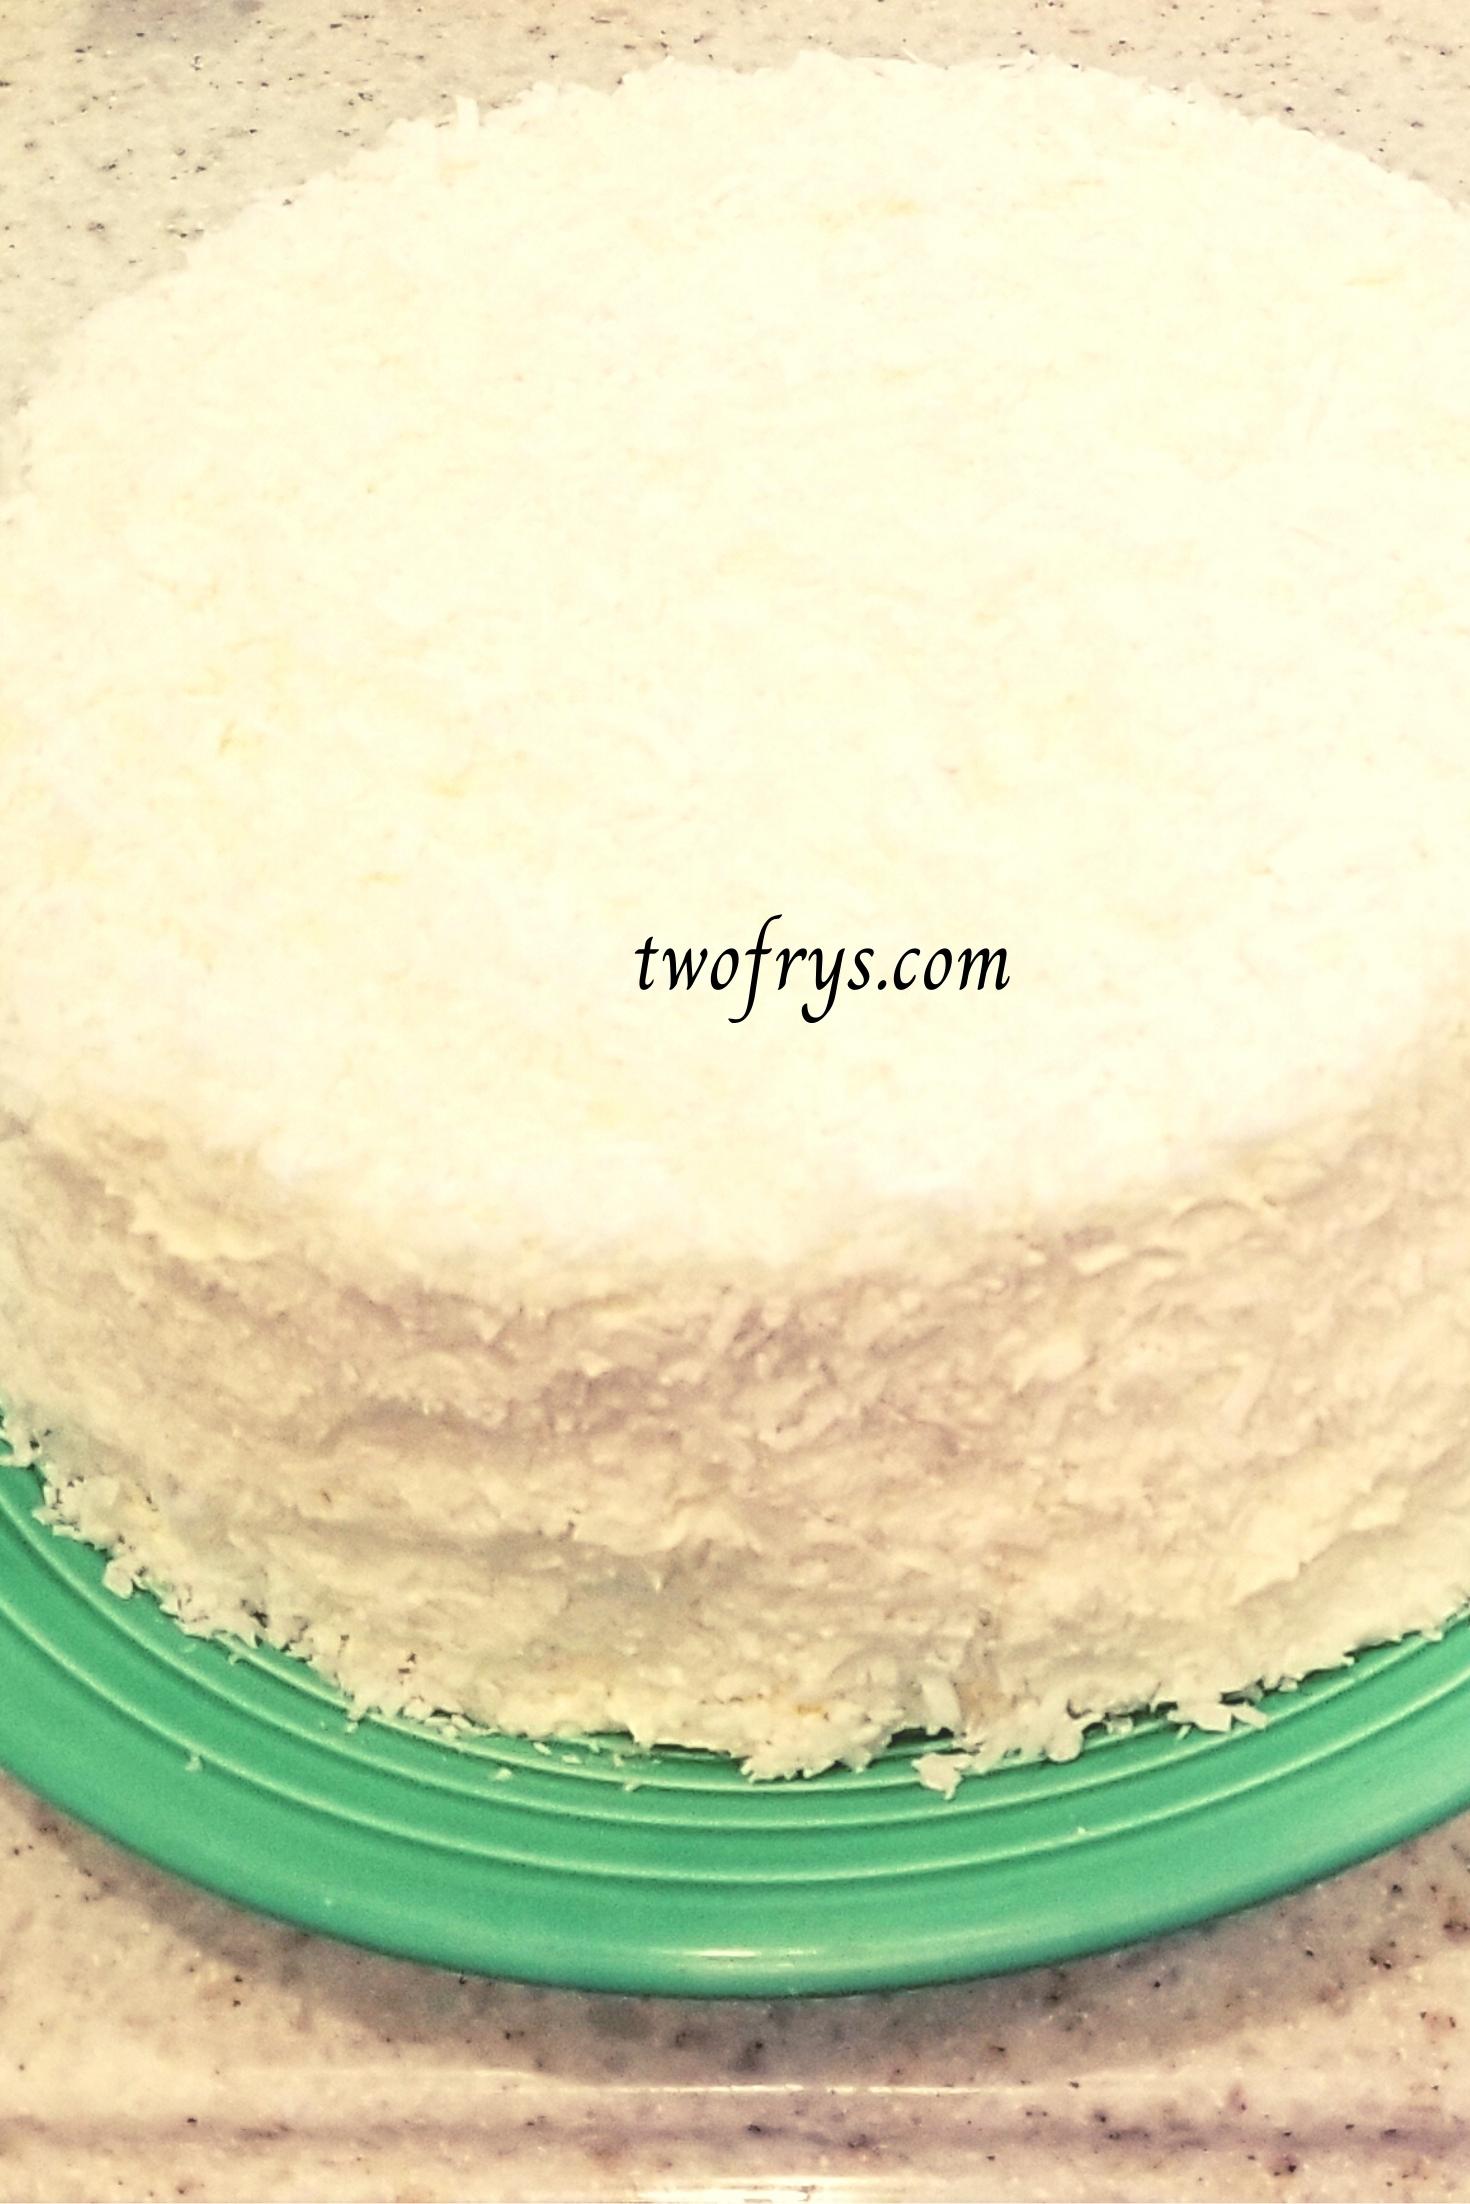
I have baked several Coconut Cake recipes over the years but one of my favorites is Ina Garten's recipe for its rich taste and perfect texture. It is always a crowd pleaser. For this recipe I use Unsweetened Shredded Coconut instead of Sweetened to reduce the sugar content. I also use Pure Vanilla Extract but if you want a whiter cake use Clear Vanilla Extract. You can also substitute the Almond Extract and use Coconut Extract, but I find the combination of Vanilla and Almond Extracts a perfect one. I baked this cake for a family gathering while on vacation. I hope you give this recipe a try.  


Ingredients

1 1/2 cups (3 sticks) Unsalted Butter, at room temperature, plus more for greasing the pans

2 cups Sugar

5 Extra Large eggs, at room temperature

1 1/2 teaspoons Pure Vanilla Extract

1 1/2 teaspoons Pure Almond Extract

3 cups All Purpose Flour, plus more for dusting the pans

1 teaspoon Baking Powder

1/2 teaspoon Baking Soda

1/2 teaspoon Coarse Salt

1 cup Milk

1/2 cup Unsweetened Shredded Coconut

Strawberry Preserves (or any filling you prefer)


Frosting Ingredients

1 pound Cream Cheese, at room temperature 

1 cup (2 sticks) Unsalted Butter, at room temperature

3/4 teaspoon Pure Vanilla Extract 

1/4 teaspoon pure Almond Extract

1 pound Confectioners'/Powdered Sugar, sifted

6 ounces Unsweetened Shredded Coconut


Directions

Heat oven to 350°F. 

Grease 2 (9-inch) round cake pans, then line them with parchment paper. Grease again and dust lightly with flour.

In a separate bowl, sift together the flour, baking powder, baking soda and salt; set aside.

Add the eggs into a small bowl; set aside. 

In the bowl of an electric mixer fitted with the paddle attachment, cream the butter and sugar on medium-high speed for 3 to 5 minutes, until light and fluffy. 

With the mixer on medium speed, add the eggs one at a time and incorporate. Scrape down the bowl once during mixing. 


Add the vanilla and almond extracts and mix well. 

With the mixer on low speed, alternately add the dry ingredients and the milk to the batter in 3 parts, beginning and ending with dry ingredients. Mix until just combined. 

Turn off the mixer and fold in the shredded coconut with a spatula and combine.

Pour the batter evenly into the two cake pans and smooth the tops with a knife. 

Bake in the center of the oven for 35 to 45 minutes, until the tops are browned, and a cake tester comes out clean. 

Cool on a wire rack for 30 minutes, then turn the cakes with tops down onto a wire rack to finish cooling.


Frosting Directions

In the bowl of an electric mixer fitted with a paddle attachment, combine the cream cheese, butter, vanilla and almond extracts on low speed. 

Add the confectioners'/powdered sugar and mix until just smooth, about 1 to 2 minutes.


Assemble the Cake

If your cake has a dome on top use a serrated knife to cut it off to an even top.

To assemble, place one layer on a flat serving plate or cake turntable, top side down, and place parchment paper around the edges for easy clean up. 

Spread with preserves, filling or frosting. 


Place the second layer on top with the top side down, and generously frost the top and sides. 

To decorate the cake, sprinkle the top with the shredded coconut and lightly press more coconut onto the sides.

Serve at room temperature.

Ina Garten, Coconut Cake recipe: https://www.foodnetwork.com/recipes/ina-garten/coconut-cake-recipe-1947027

-Sophia/Two Frys

Saturday, February 26, 2022

Banana Nut Muffins

Banana Nut Muffins


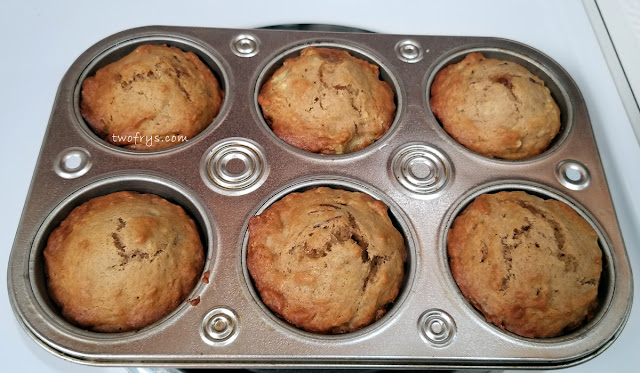
When I buy bananas, I tend to pick them when they are green. Personally, I prefer to eat them when they are a little green. This week I ended up with really ripe bananas and made banana nut muffins. They are packed with flavor and the pecans give them a crunchy texture. You can use any nut you like but pecans were what I had in my pantry. The cinnamon-sugar mixture that top the muffins elevate the flavor profile. This recipe does not require a mixer and is so simple to do. The aromatics from the cinnamon while they baked was sublime. They are yummy. Enoy with your favorite cup of coffee or tea. I hope you give this recipe a try.

Yield: 1 dozen muffins


Muffin Ingredients

1 2/3 All-Purpose Flour

1 teaspoon Baking Soda

1/2 teaspoon Salt

1 teaspoon Ground Cinnamon

2/3 cup Light Brown Sugar

1/2 cup Vegetable Oil

2 Large Eggs, room temperature

1 teaspoon Pure Vanilla Extract

2/3 cup Ripe Bananas (About 2 small bananas)

1/2 cup Pecans, chopped and toasted


Muffin Topping

1/4 cup Turbinado or Granulated Sugar

1/2 teaspoon Ground Cinnamon

1/4 cup (4 tablespoons) Unsalted Butter, melted and cooled


Directions

Mash bananas; set aside.

In a medium bowl, whisk together the flour, baking soda, ground cinnamon, and salt; set aside.

Chop pecans and toast in pan for about 10 minutes. Let cool; set aside.

Melt butter for the topping. Remove from heat to cool.

Heat oven to 375°F.

Grease bottoms of 12 regular size muffin pans or line with paper baking cups. I use Wilton Baking Spray.

In a large bowl, whisk together the sugar, oil and eggs.

Stir with a spatula the mashed bananas and vanilla extract.

Add flour mixture and combine until incorporated.

Using a spatula fold in the toasted pecans.

Add the batter evenly to muffin pan.

Bake for 16-22 minutes or until a toothpick inserted in the center comes out clean. Ovens vary so check the muffins at the 16-minute mark and adjust the baking time accordingly.

Place onto wire racks.

In a small bowl combine with spatula 1/4 cup sugar and 1/2 teaspoon ground cinnamon.

Dip each of the muffin tops into the cooled melted butter and then into the cinnamon-sugar mixture.

Enjoy warm.

Recipe adapted from Betty Crocker, Banana-Cinnamon Muffins: 

https://www.bettycrocker.com/recipes/banana-cinnamon-muffins/

-Sophia/Two Frys
Monday, February 14, 2022

Coconut Layer Cake

 Coconut Layer Cake

For Valentine's Day this year I baked a coconut layer cake for Allen and me to indulge in. The first time I made this recipe was for my Winter Wonderland Cake.  I love coconut cake and the coconut flavor in this recipe is prominent from the coconut milk, coconut extract, and desiccated coconut. I adapted the Cook's Illustrated white layer cake recipe (link below) into a coconut layer cake. I replaced the milk to coconut milk and used coconut extract instead of almond extract. The coconut frosting is adapted from, The Complete America's Test Kitchen TV Show Cookbook 2001-2010 (pgs. 498-99). This cake is light and moist and has a tender crumb. The coconut taste is superb and the desiccated coconut all over the cake gives it a great texture. I used unsweetened desiccated coconut to cut the sugar content a wee bit. I also substituted granulated sugar for vanilla sugar which also brings out the flavor profile. For the filling, I used raspberry preserves, but you can use strawberry or cherry preserves/filling, pastry cream, coconut curd or whatever you prefer. The preserves bring out the coconut flavor and gives the cake a nice pop of color perfect for Valentine's Day. I wish you and your loved ones a Happy Valentine's Day.


Coconut Cake Ingredients

2 1/4 cups Cake Flour, plus more for pans

4 teaspoons Baking Powder

1 teaspoon Coarse Salt

1 3/4 cups Vanilla Sugar (or Granulated Sugar)

1 1/2 sticks (12 tablespoons) Unsalted Butter, softened

1 cup Coconut Milk, canned and room temperature

6 Large Egg Whites, room temperature

2 teaspoons Coconut Extract

1 teaspoon Clear Vanilla Extract


Directions

Heat oven to 350°F.

Grease 2 9-inch cake pans, line with parchment paper, grease and sprinkle with cake flour. Tap pans on counter to remove excess cake flour.

In a medium sized bowl whisk together the coconut milk, egg whites, coconut and vanilla extracts; set aside. Take 1/2 cup of the coconut mixture and place it into a small bowl.

Using a mixer with the paddle attachment, mix on low speed the cake flour, baking powder and salt until combined; about 1 minute.

Increase mixer speed to medium and add the softened butter to the flour mixture and beat until it resembles light crumbs; about 1 minute.

Turn mixer to low speed and add all but 1/2 cup of the coconut milk mixture then increase speed to medium and beat until smooth, light and fluffy; about 1-2 minutes.

Scrape sides of the bowl and beat on medium-high speed: about 20 seconds.

Reduce mixer speed to low and slowly add the remaining 1/2 cup of the coconut mixture and beat until batter is combined; about 1 minute.


Add the batter evenly into the prepared pans, smooth the tops with a spatula or knife, and lightly tap the pans against the countertops two to four times to settle the batter.

Bake until a toothpick inserted in the center comes out clean or with a few moist crumbs; 22-25 minutes.

Ovens vary so check the cake at 22 minutes or earlier and adjust the baking time accordingly.

Cool cakes in pans for 10 minutes. Run a small knife around the edge of the cakes.

Cool for 20 more minutes, peel off the parchment paper and flip the cakes right side up onto wire racks lined with parchment paper; cool completely.

Take the cooled cake, cover with plastic wrap and chill in the fridge overnight or wait at least 1 hour if frosting the same day.

If you can chill the cake overnight, it will be easier to frost and not be as crumbly, and the flavors develop more as well.


Filling

Raspberry Preserves (or filling of your choice)


Coconut Frosting Ingredients

2 tablespoons Heavy Cream

1 teaspoon Coconut Extract

1 teaspoon Clear Vanilla Extract

1/2 teaspoon Coarse Salt

2 sticks (16 tablespoons) Unsalted Butter, softened

1/4 cup Coconut Milk, canned and room temperature

3 cups Confectioners/Powdered Sugar

Shredded or Desiccated Coconut (Unsweetened)


Coconut Frosting Directions

In a small bowl, stir together the cream, coconut and vanilla extracts, and salt.

Using a mixer with a paddle attachment, beat butter and coconut milk mixture on medium-high speed until smooth; about 30-45 seconds.

Reduce the mixer speed to medium-low and gradually beat in confectioners/powdered sugar, then continue beating until smooth; about 3 minutes.


Frost Cake 

If the cake tops are not flat, use a large, serrated knife to remove the domes off the top of the cake.

Place 4-5 dots of icing on a cake circle and spread with spatula. This helps adhere it to the cake and prevent it from moving around.

Place one of the cake layers top side down on a cardboard cake circle. 

Place a non-slip surface on the cake turntable to keep the cake from sliding around. Place the cake circle with the first cake layer on the turntable.

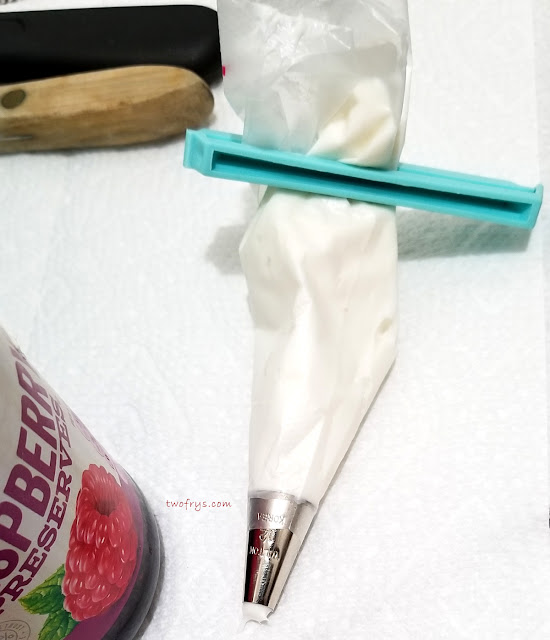
Add some of the frosting to a decorating bag fitted with a large round tip like Wilton 12 or Ateco 808 to create a dam of icing inside the outer edge of the cake. This helps the filling from seeping out.

Using a spatula spread the raspberry preserves evenly on top of the cake layer inside the dam.

The filling should fill the dam halfway.


Add the coconut frosting on top of the filling and spread to an even layer to fill the remaining dam space.

Add shredded or desiccated coconut over the frosting.

Place the top layer top side down over the first layer and press lightly to adhere.

Frost the top and sides of the cake with a large spatula.

Cover the entire cake or use as much or little as you want of the shredded or desiccated coconut. Decorate as desired.

Chill the cake in the fridge for 2-3 hours and let it come to room temperature for 30 minutes before serving.


For the Cook's Illustrated White Layer Cake recipe, visit Epicurious:

https://www.epicurious.com/recipes/member/views/cooks-illustrated-white-layer-cake-50017374


-Sophia/Two Frys