

As I mentioned in my previous post Pumpkin Crinkle Cookies, I am thrilled it is pumpkin pie spice season. I have a jar full of pumpkin pie spice and am baking with the spices of fall. Nothing is better than the smell of pumpkin pie spice coming from the oven. I add a good amount of pumpkin pie spice to my baking as I want it to be prominent and not just a hint of spice. You can reduce the amount if you desire. This is a Pumpkin Maple Sugar Cookie recipe and a new favorite. I made various leaf shapes, acorns, apples, sunflowers, and wafer paper fall designs. Also, a few owls with some chocolate sugar cookie dough I saved from a previous recipe. Click here for my Pumpkin Pie Spice Recipe.
 |
| Pumpkin Maple Fall Theme Cookies |
 |
| Pumpkin Maple Fall Theme Cookies |
Yield: 3 1/2-4 Dozen Cookies (Depending on cutter size and thickness of cookie)
Ingredients
5 cups King Arthur All Purpose Flour
2 cups Domino Golden Sugar (or Granulated or Light Brown Sugar)
3 1/2 teaspoons Pumpkin Pie Spice
1 teaspoon Coarse Salt
1/4 cup Pumpkin Puree
2 cups (4 sticks) Unsalted Butter, softened
2 Large Eggs
1 teaspoon Maple Extract
Directions
In a large bowl whisk together the flour, pumpkin pie spice and salt; set aside.
Cream butter and sugar in a hand held mixer or stand mixer with paddle attachment on low; 1-2 minutes. Do not overmix.
Scrape sides of bowl with spatula and mix for 5 more seconds.
Add pumpkin puree, eggs, and maple extract, and mix until incorporated; about 1 minute.
Scrape sides of bowl and mix for 5 seconds.
Ingredients
5 cups King Arthur All Purpose Flour
2 cups Domino Golden Sugar (or Granulated or Light Brown Sugar)
3 1/2 teaspoons Pumpkin Pie Spice
1 teaspoon Coarse Salt
1/4 cup Pumpkin Puree
2 cups (4 sticks) Unsalted Butter, softened
2 Large Eggs
1 teaspoon Maple Extract
 |
| Wafer Paper Fall Designs |
 |
| Sunflowers and Apples, messed up stencil (used too much icing) |
Directions
In a large bowl whisk together the flour, pumpkin pie spice and salt; set aside.
Cream butter and sugar in a hand held mixer or stand mixer with paddle attachment on low; 1-2 minutes. Do not overmix.
Scrape sides of bowl with spatula and mix for 5 more seconds.
Add pumpkin puree, eggs, and maple extract, and mix until incorporated; about 1 minute.
Scrape sides of bowl and mix for 5 seconds.
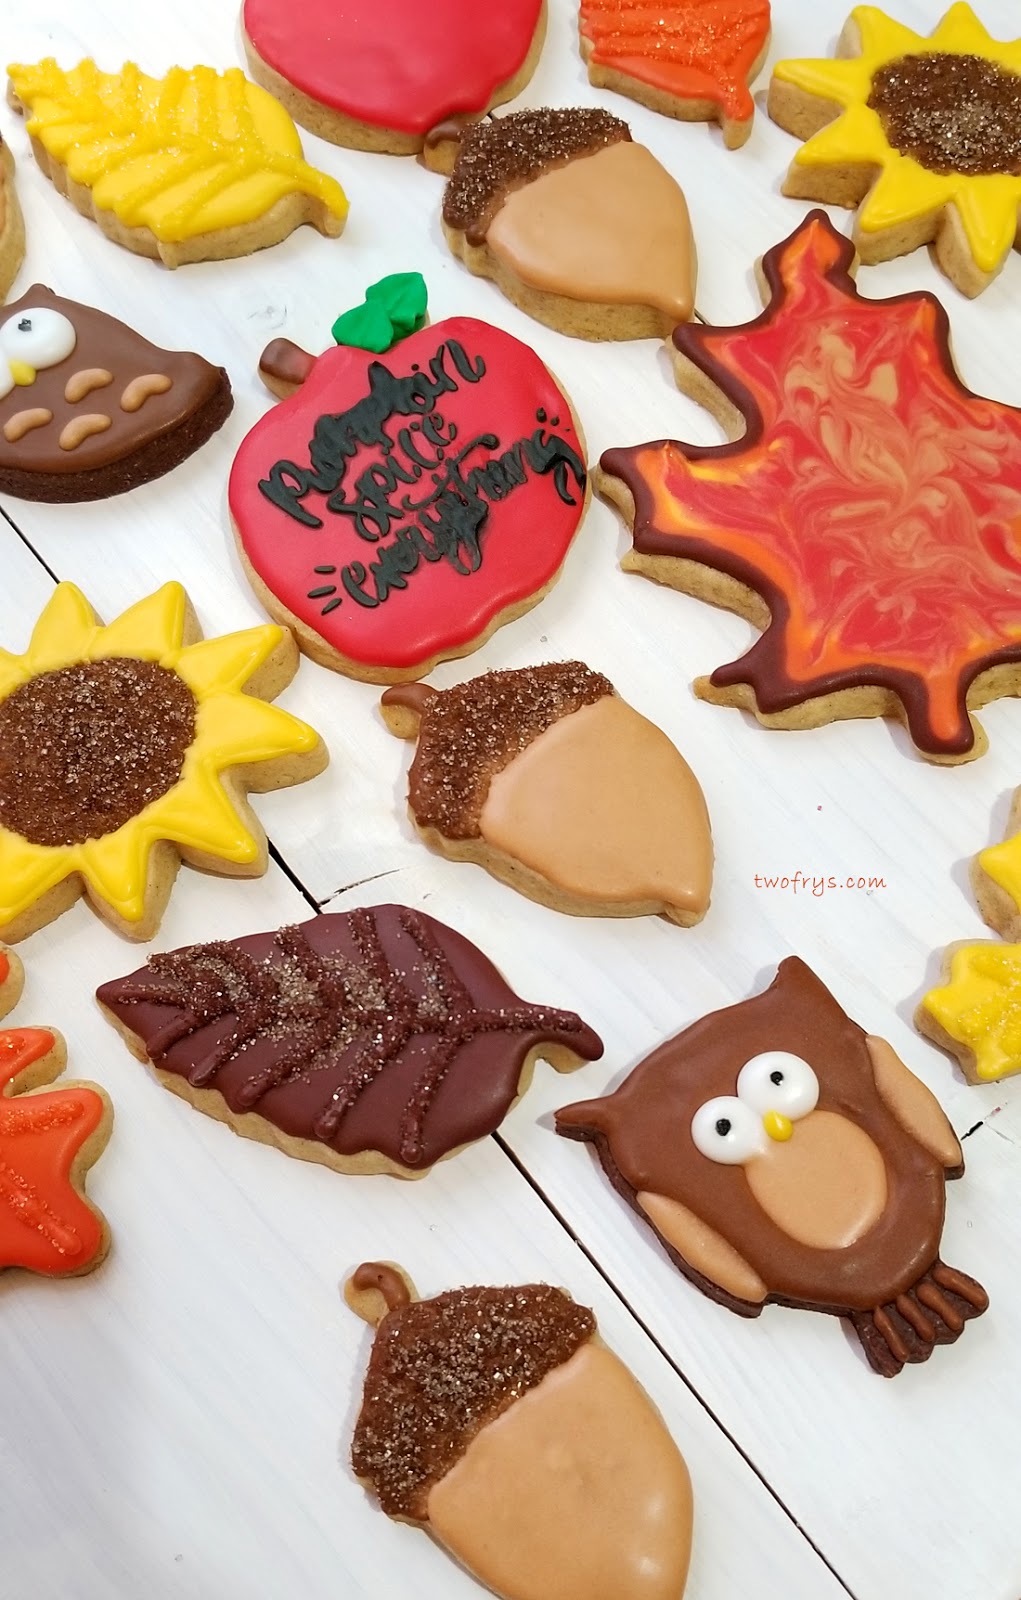 |
| Fall Theme Cookies |
 |
| Fall Theme Cookies |
Turn the mixer off and add the flour mixture. Cover the mixer with kitchen towel, and turn on low speed and incorporate.
The dough is ready when it begins to clump around the paddle attachment.
Form dough into a disk shape and cover with plastic wrap and chill in fridge for 1-3 hours or overnight. I chilled the dough for 2 hours.
Heat oven to 350°F.
Use two sheets of parchment paper with dough in between and roll with rolling pin until desired thickness is reached.
Cut out shapes.
Place onto cookie sheets lined with parchment paper, and put in freezer for 20 minutes. The cookies hold their shape when you do this.
Bake 8-13 minutes or until the edges have slightly browned. My cookies baked in 13 minutes.
Oven temps vary so check the cookies at the 9 minute mark.
Make sure the cookie sheets cool in between baking. I place them in the freezer for 5 minutes, and repeat until all the dough is used.
Do not use hot cookie sheets or the cookies will spread and lose their shape.
Wait 5 minutes before transferring cookies with cookie spatula to wire racks to complete cooling; about 1 hour.
Decorate once the cookies are cool to the touch.
Large Batch Royal Icing
Ingredients
8 Egg Whites
8 teaspoons Lemon Juice, freshly squeezed
12 cups Powdered/Confectioners' Sugar, sifted
1 tablespoon Clear Vanilla Extract
Directions
In a large bowl, sift the powdered sugar; set aside.
Separate the yolks and add the egg whites in a bowl.
In a bowl, whisk together the egg whites and lemon juice.
Transfer to a stand or hand held mixer with paddle attachment and mix on high for 1-2 minutes.
Add the vanilla extract and mix for 5-10 seconds.
The dough is ready when it begins to clump around the paddle attachment.
Form dough into a disk shape and cover with plastic wrap and chill in fridge for 1-3 hours or overnight. I chilled the dough for 2 hours.
Heat oven to 350°F.
 |
| Fall Theme Cookies |
 |
| Fall Theme Cookies |
Cut out shapes.
Place onto cookie sheets lined with parchment paper, and put in freezer for 20 minutes. The cookies hold their shape when you do this.
Bake 8-13 minutes or until the edges have slightly browned. My cookies baked in 13 minutes.
Oven temps vary so check the cookies at the 9 minute mark.
 |
| Fall Theme Cookies |
 |
| Owl Cookies |
Do not use hot cookie sheets or the cookies will spread and lose their shape.
Wait 5 minutes before transferring cookies with cookie spatula to wire racks to complete cooling; about 1 hour.
Decorate once the cookies are cool to the touch.
 |
| Ingredients |
 |
| Domino Golden Sugar |
Large Batch Royal Icing
Ingredients
8 Egg Whites
8 teaspoons Lemon Juice, freshly squeezed
12 cups Powdered/Confectioners' Sugar, sifted
1 tablespoon Clear Vanilla Extract
 |
| Yummy Pumpkin |
 |
| Use kitchen towel after you add the flour; prevents a mess! |
Directions
In a large bowl, sift the powdered sugar; set aside.
Separate the yolks and add the egg whites in a bowl.
In a bowl, whisk together the egg whites and lemon juice.
Transfer to a stand or hand held mixer with paddle attachment and mix on high for 1-2 minutes.
Add the vanilla extract and mix for 5-10 seconds.
 |
| Pumpkin Maple Sugar Cookie Dough |
 |
| Lemon Juice and Egg Whites combined and going into mixer |
With the mixer off add the sifted powdered sugar, cover the mixer with a kitchen towel, and turn the mixer to low speed and beat until smooth.
The consistency using this recipe is thick and great for borders and detail work.
If you need a both a border and flood-like consistency keep reading below.
If you only need flood consistency icing, add 1/2 teaspoon of water and mix for 5-10 seconds, and repeat until you reach the right consistency. Be careful that your icing does not become too runny or you may have to start over.
I found the best way to make royal icing is to first separate the icing in plastic containers with lids according to the different colors needed. I save the containers when I order soup from Chinese takeout. These containers are great for icing. You can also use Tupperware or Pyrex.
Keep the containers or Tupperware/Pyrex covered until you are ready to color. Royal Icing hardens fast.
I use Soft Gel Paste Food Color in various colors.
Use 1-2 drops at a time until you reach the desired color. Icing color darkens over time so use as little as possible.
Once you have the colors completely mixed in each container, take the amount you need of the border icing consistency and transfer into icing bottles or tipless bags.
Then with the remainder of the icing, use a spritz bottle with water to make flood consistency icing.
Just spritz one or two times in the container and stir together with a small spatula or spoon. A little water goes a long way. This works for me and I get the flood consistency I need. This part takes some practice and patience. Lastly, transfer the flood icing into icing bottles or tipless bags.
I find doing it this way is easiest as you end up with the same color for both the border and flood consistency.
Decorate your cookies.
Do a border and then fill it immediately. If you are adding layers let the first layer dry completely.
I use a cookie stick to reach edges, and the tip to pop any air bubbles.
I let the cookies dry overnight. Do second layers on day 2.
Please keep in mind if you are baking and it is humid, you may need more time for the cookies to dry.
Enjoy!
-Sophia/Two Frys
The consistency using this recipe is thick and great for borders and detail work.
If you need a both a border and flood-like consistency keep reading below.
If you only need flood consistency icing, add 1/2 teaspoon of water and mix for 5-10 seconds, and repeat until you reach the right consistency. Be careful that your icing does not become too runny or you may have to start over.
I found the best way to make royal icing is to first separate the icing in plastic containers with lids according to the different colors needed. I save the containers when I order soup from Chinese takeout. These containers are great for icing. You can also use Tupperware or Pyrex.
Keep the containers or Tupperware/Pyrex covered until you are ready to color. Royal Icing hardens fast.
 |
| Royal Icing in bottles and tipless bags |
 |
| Cookies on wire racks to cool |
I use Soft Gel Paste Food Color in various colors.
Use 1-2 drops at a time until you reach the desired color. Icing color darkens over time so use as little as possible.
Once you have the colors completely mixed in each container, take the amount you need of the border icing consistency and transfer into icing bottles or tipless bags.
Then with the remainder of the icing, use a spritz bottle with water to make flood consistency icing.
Just spritz one or two times in the container and stir together with a small spatula or spoon. A little water goes a long way. This works for me and I get the flood consistency I need. This part takes some practice and patience. Lastly, transfer the flood icing into icing bottles or tipless bags.
I find doing it this way is easiest as you end up with the same color for both the border and flood consistency.
 |
| Some tools I use when decorating cookies |
 |
| Leaves changing colors |
Decorate your cookies.
Do a border and then fill it immediately. If you are adding layers let the first layer dry completely.
I use a cookie stick to reach edges, and the tip to pop any air bubbles.
I let the cookies dry overnight. Do second layers on day 2.
Please keep in mind if you are baking and it is humid, you may need more time for the cookies to dry.
Enjoy!
-Sophia/Two Frys
No comments:
Post a Comment
Note: Only a member of this blog may post a comment.